ESPhome on an Aqara Tunable white bulb?
The problem
I have used for some years an Aqara tunable white LED bulb for some years in the office, then bedroom at home: during the day light was kept colder with a script to adapt the colour temperature to the hour of the day, and during the evening it was dimmed before going to bed. The automation and the light in general was controlled using Home Assistant with Zigbee2MQTT, without using the original Xiaomi app.
One day someone was playing with it to turn it repeatedly on and off or to change its brightness, and a certain point of the light turned off and stopped responding.
I tried to reset it with the normal procedure (five consecutive on an off cycles), but this didn’t work as easily as it should have. Once I was able to succeed, I found out that the light could be paired but it would stay on, without responding to remote commands. Also, once turned off, it would not turn on again.
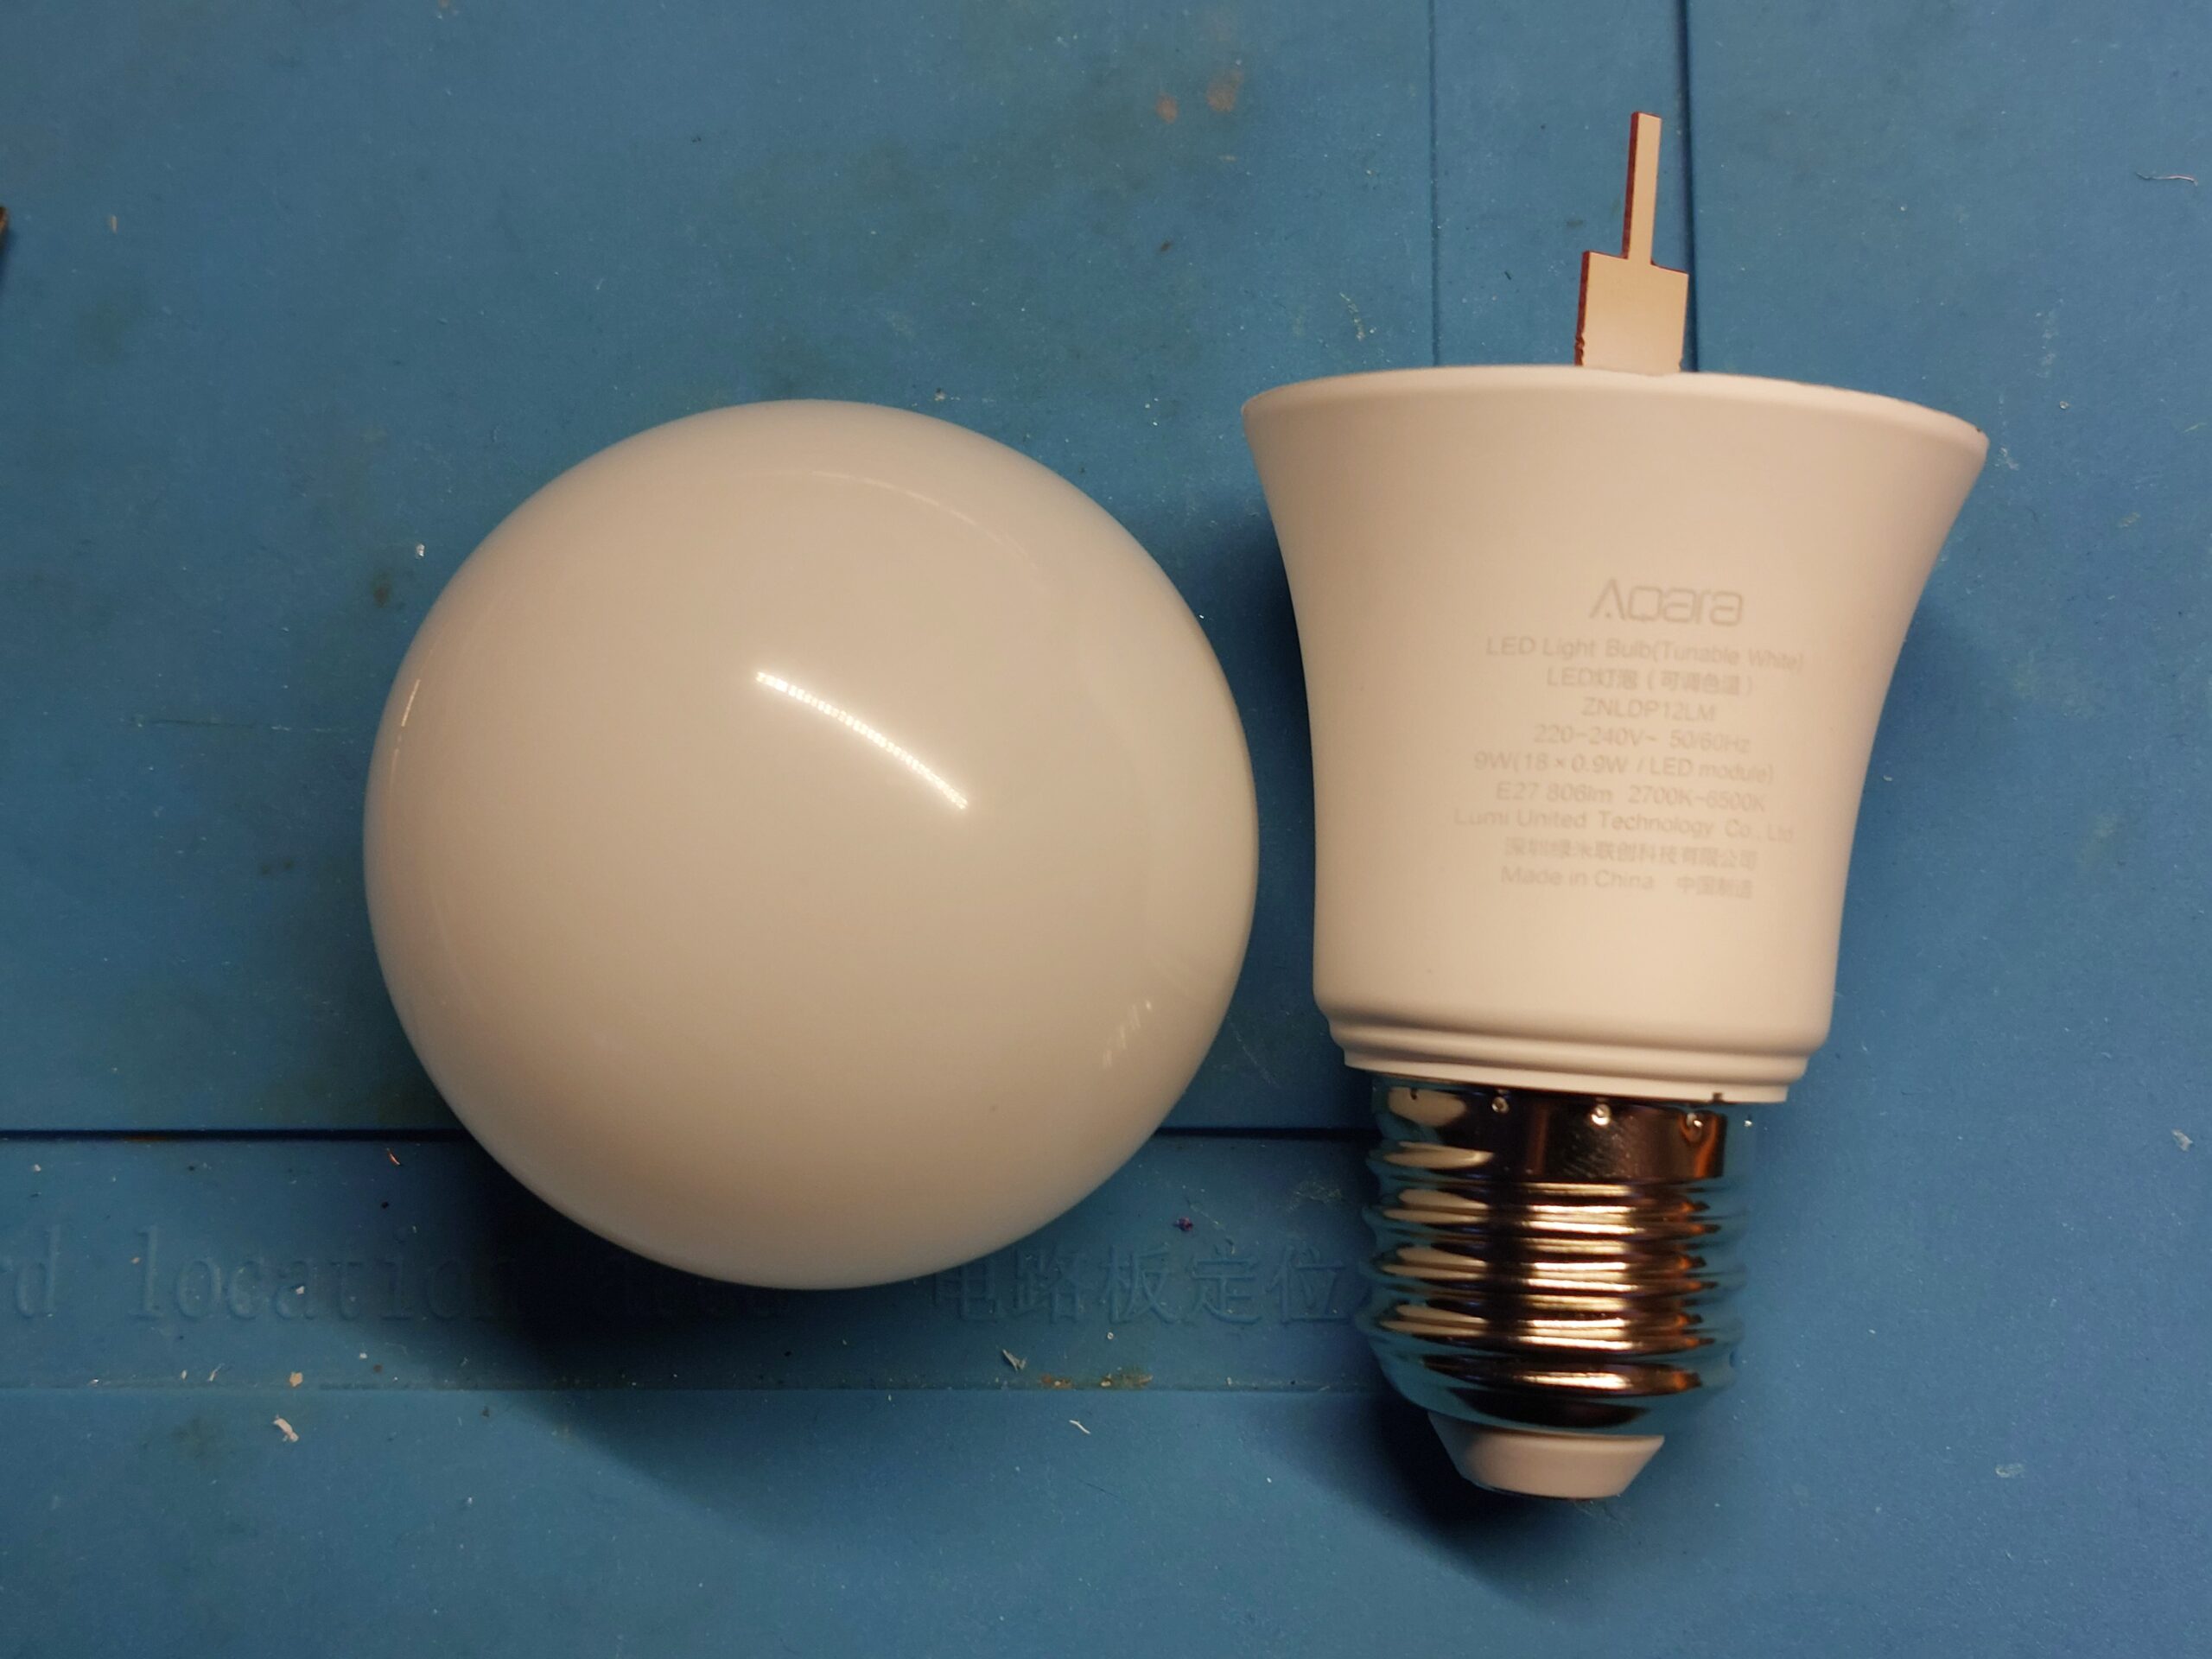
I disassembled it to understand the cause of failure.
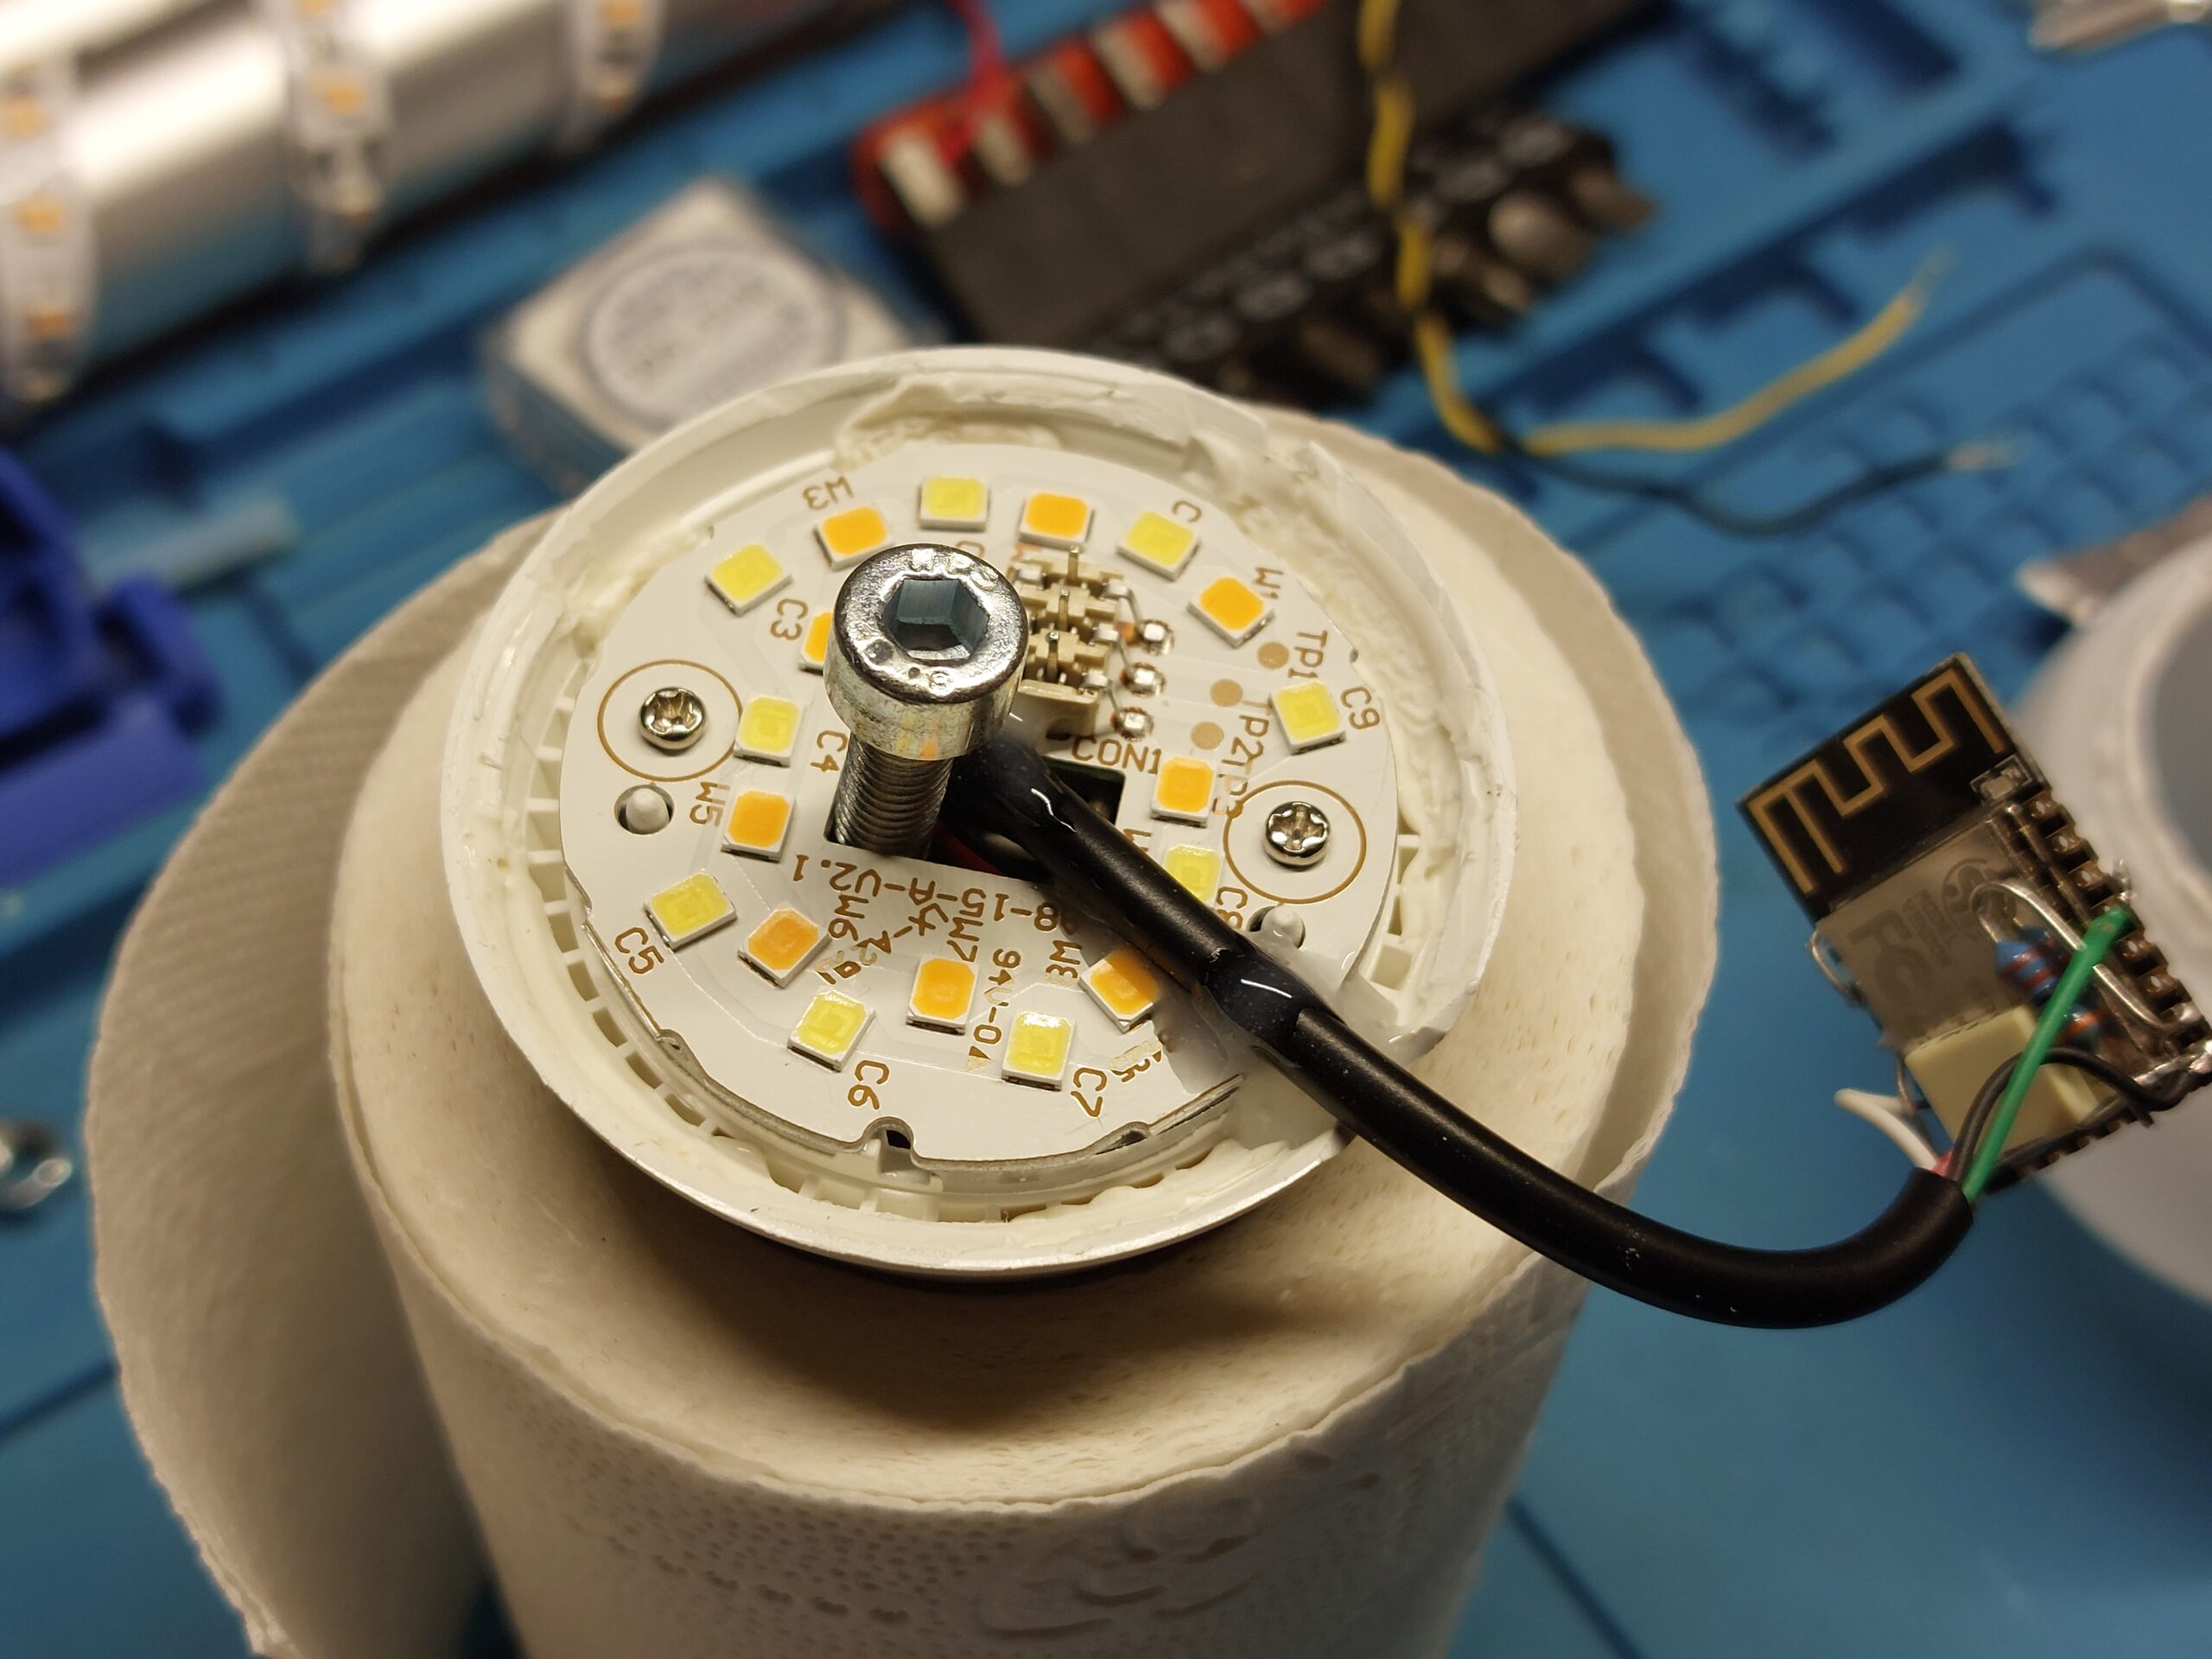
Disassembly and components
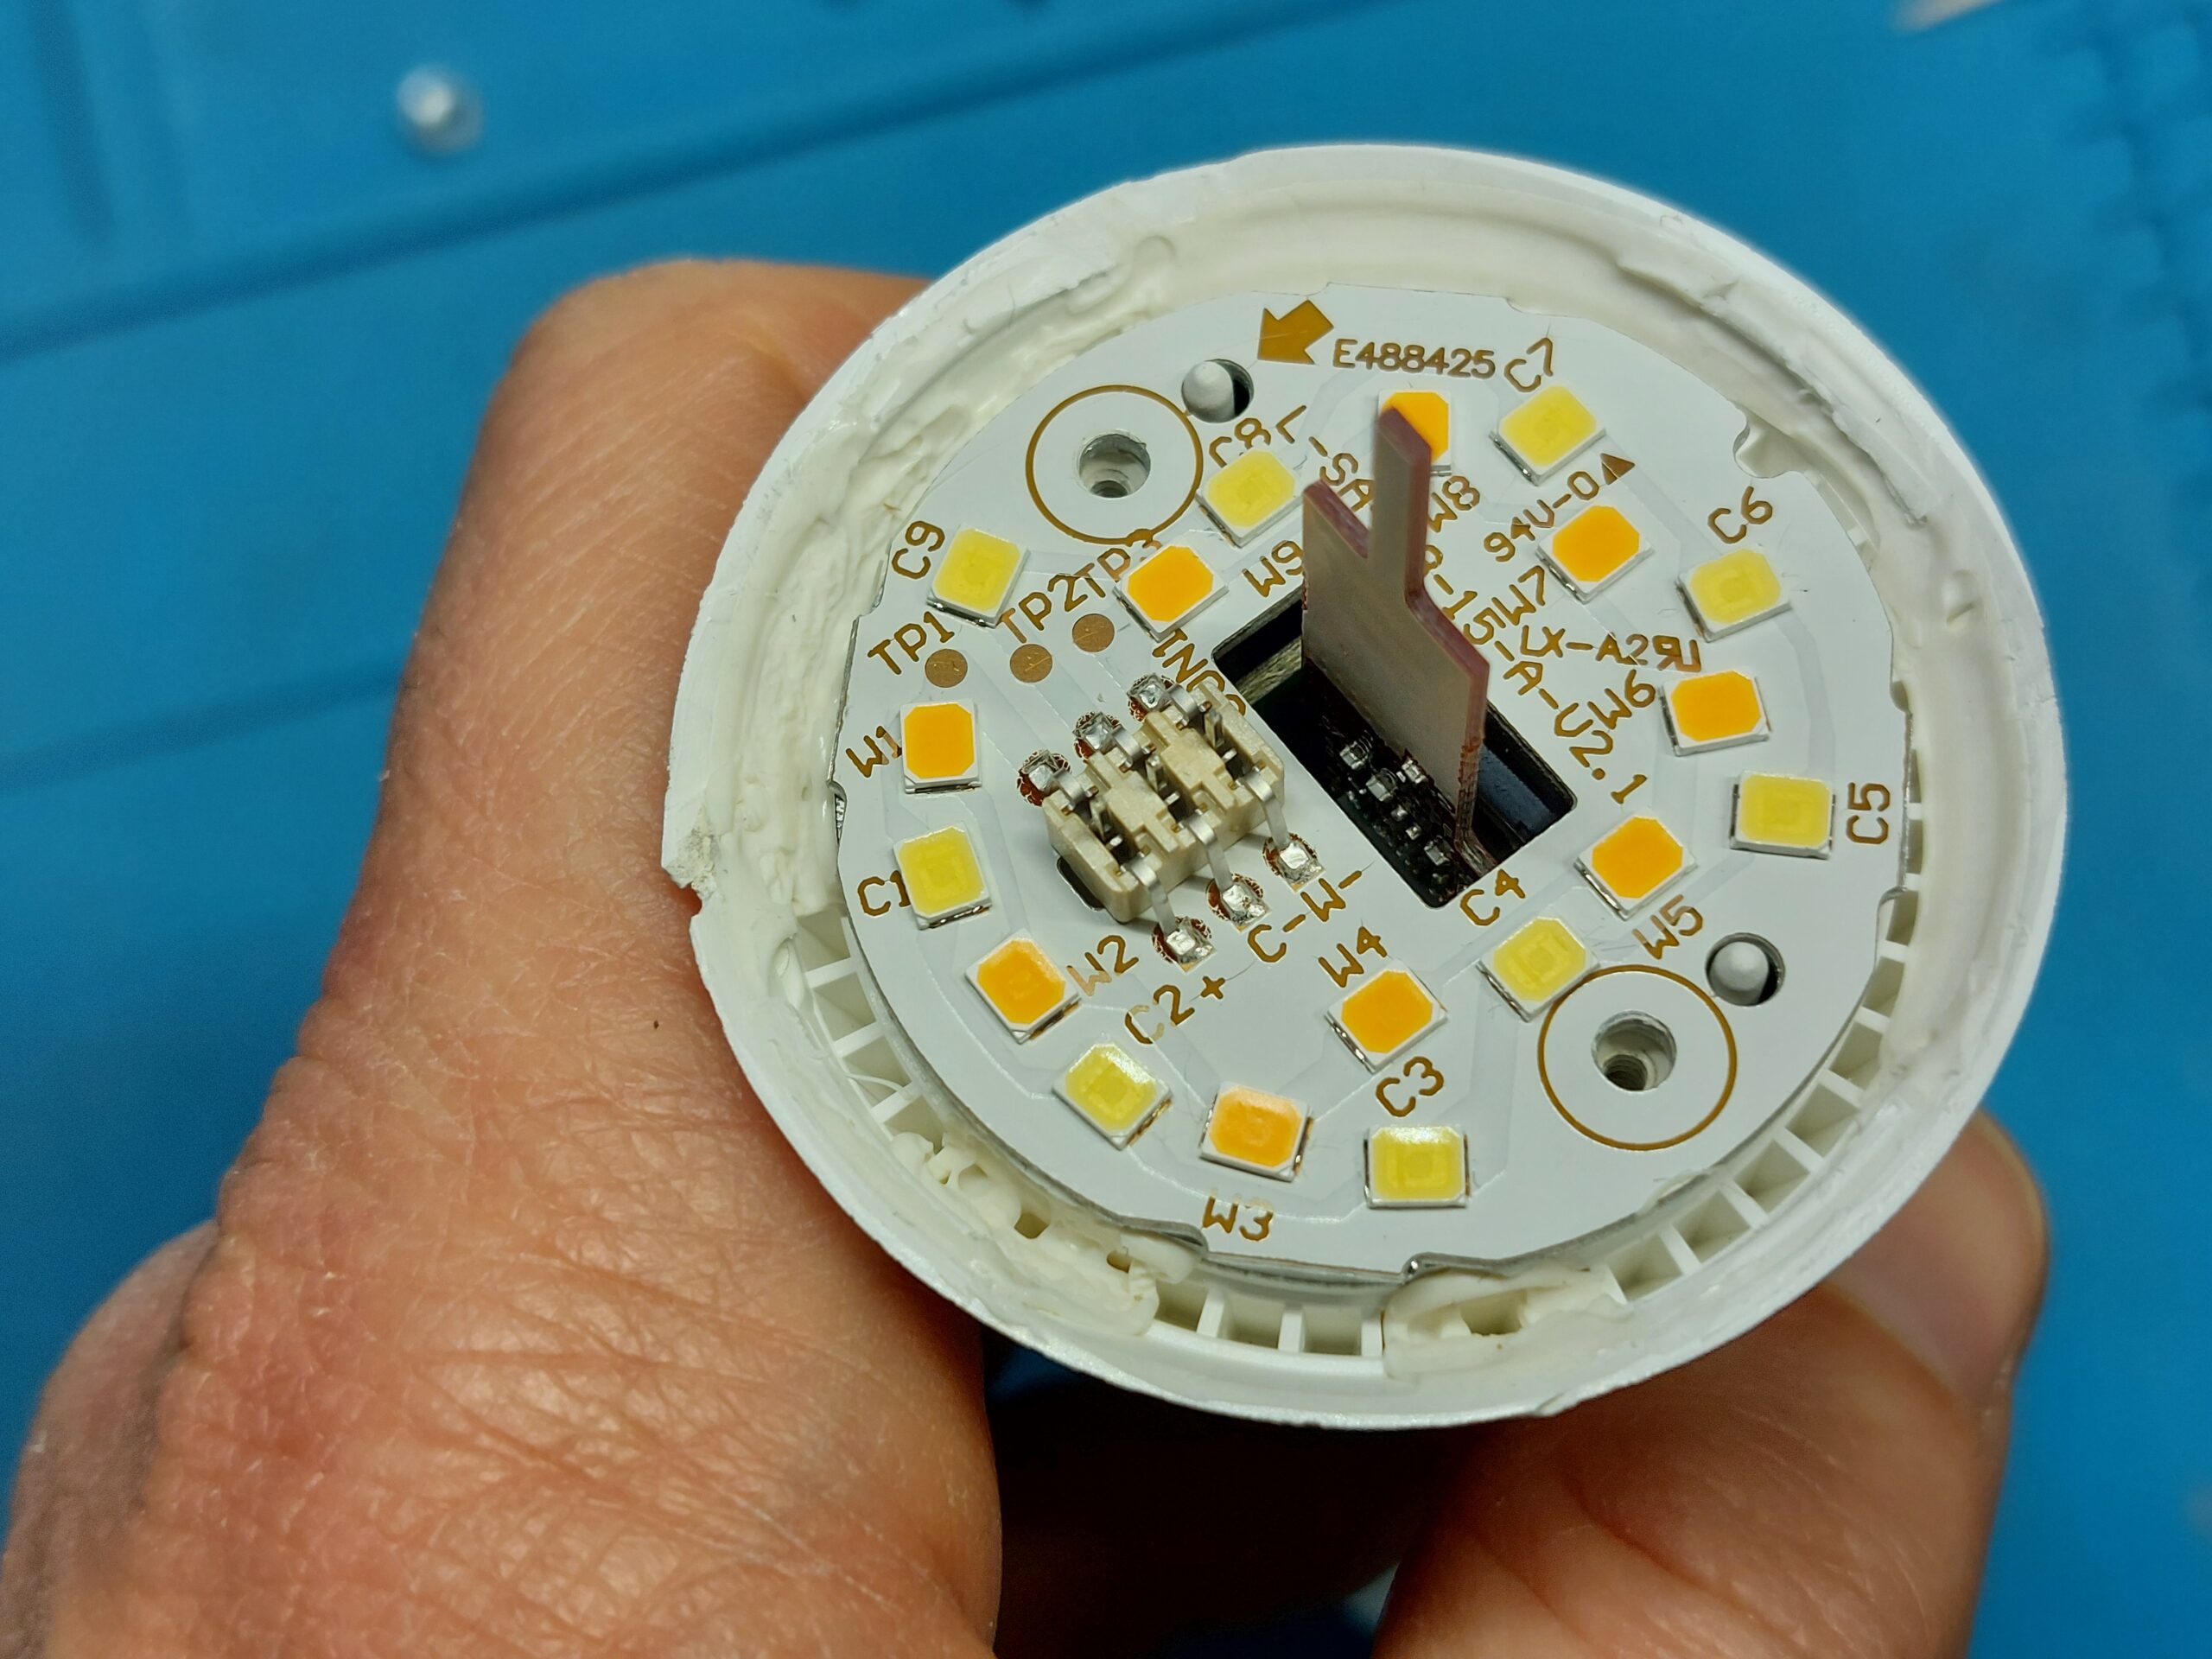
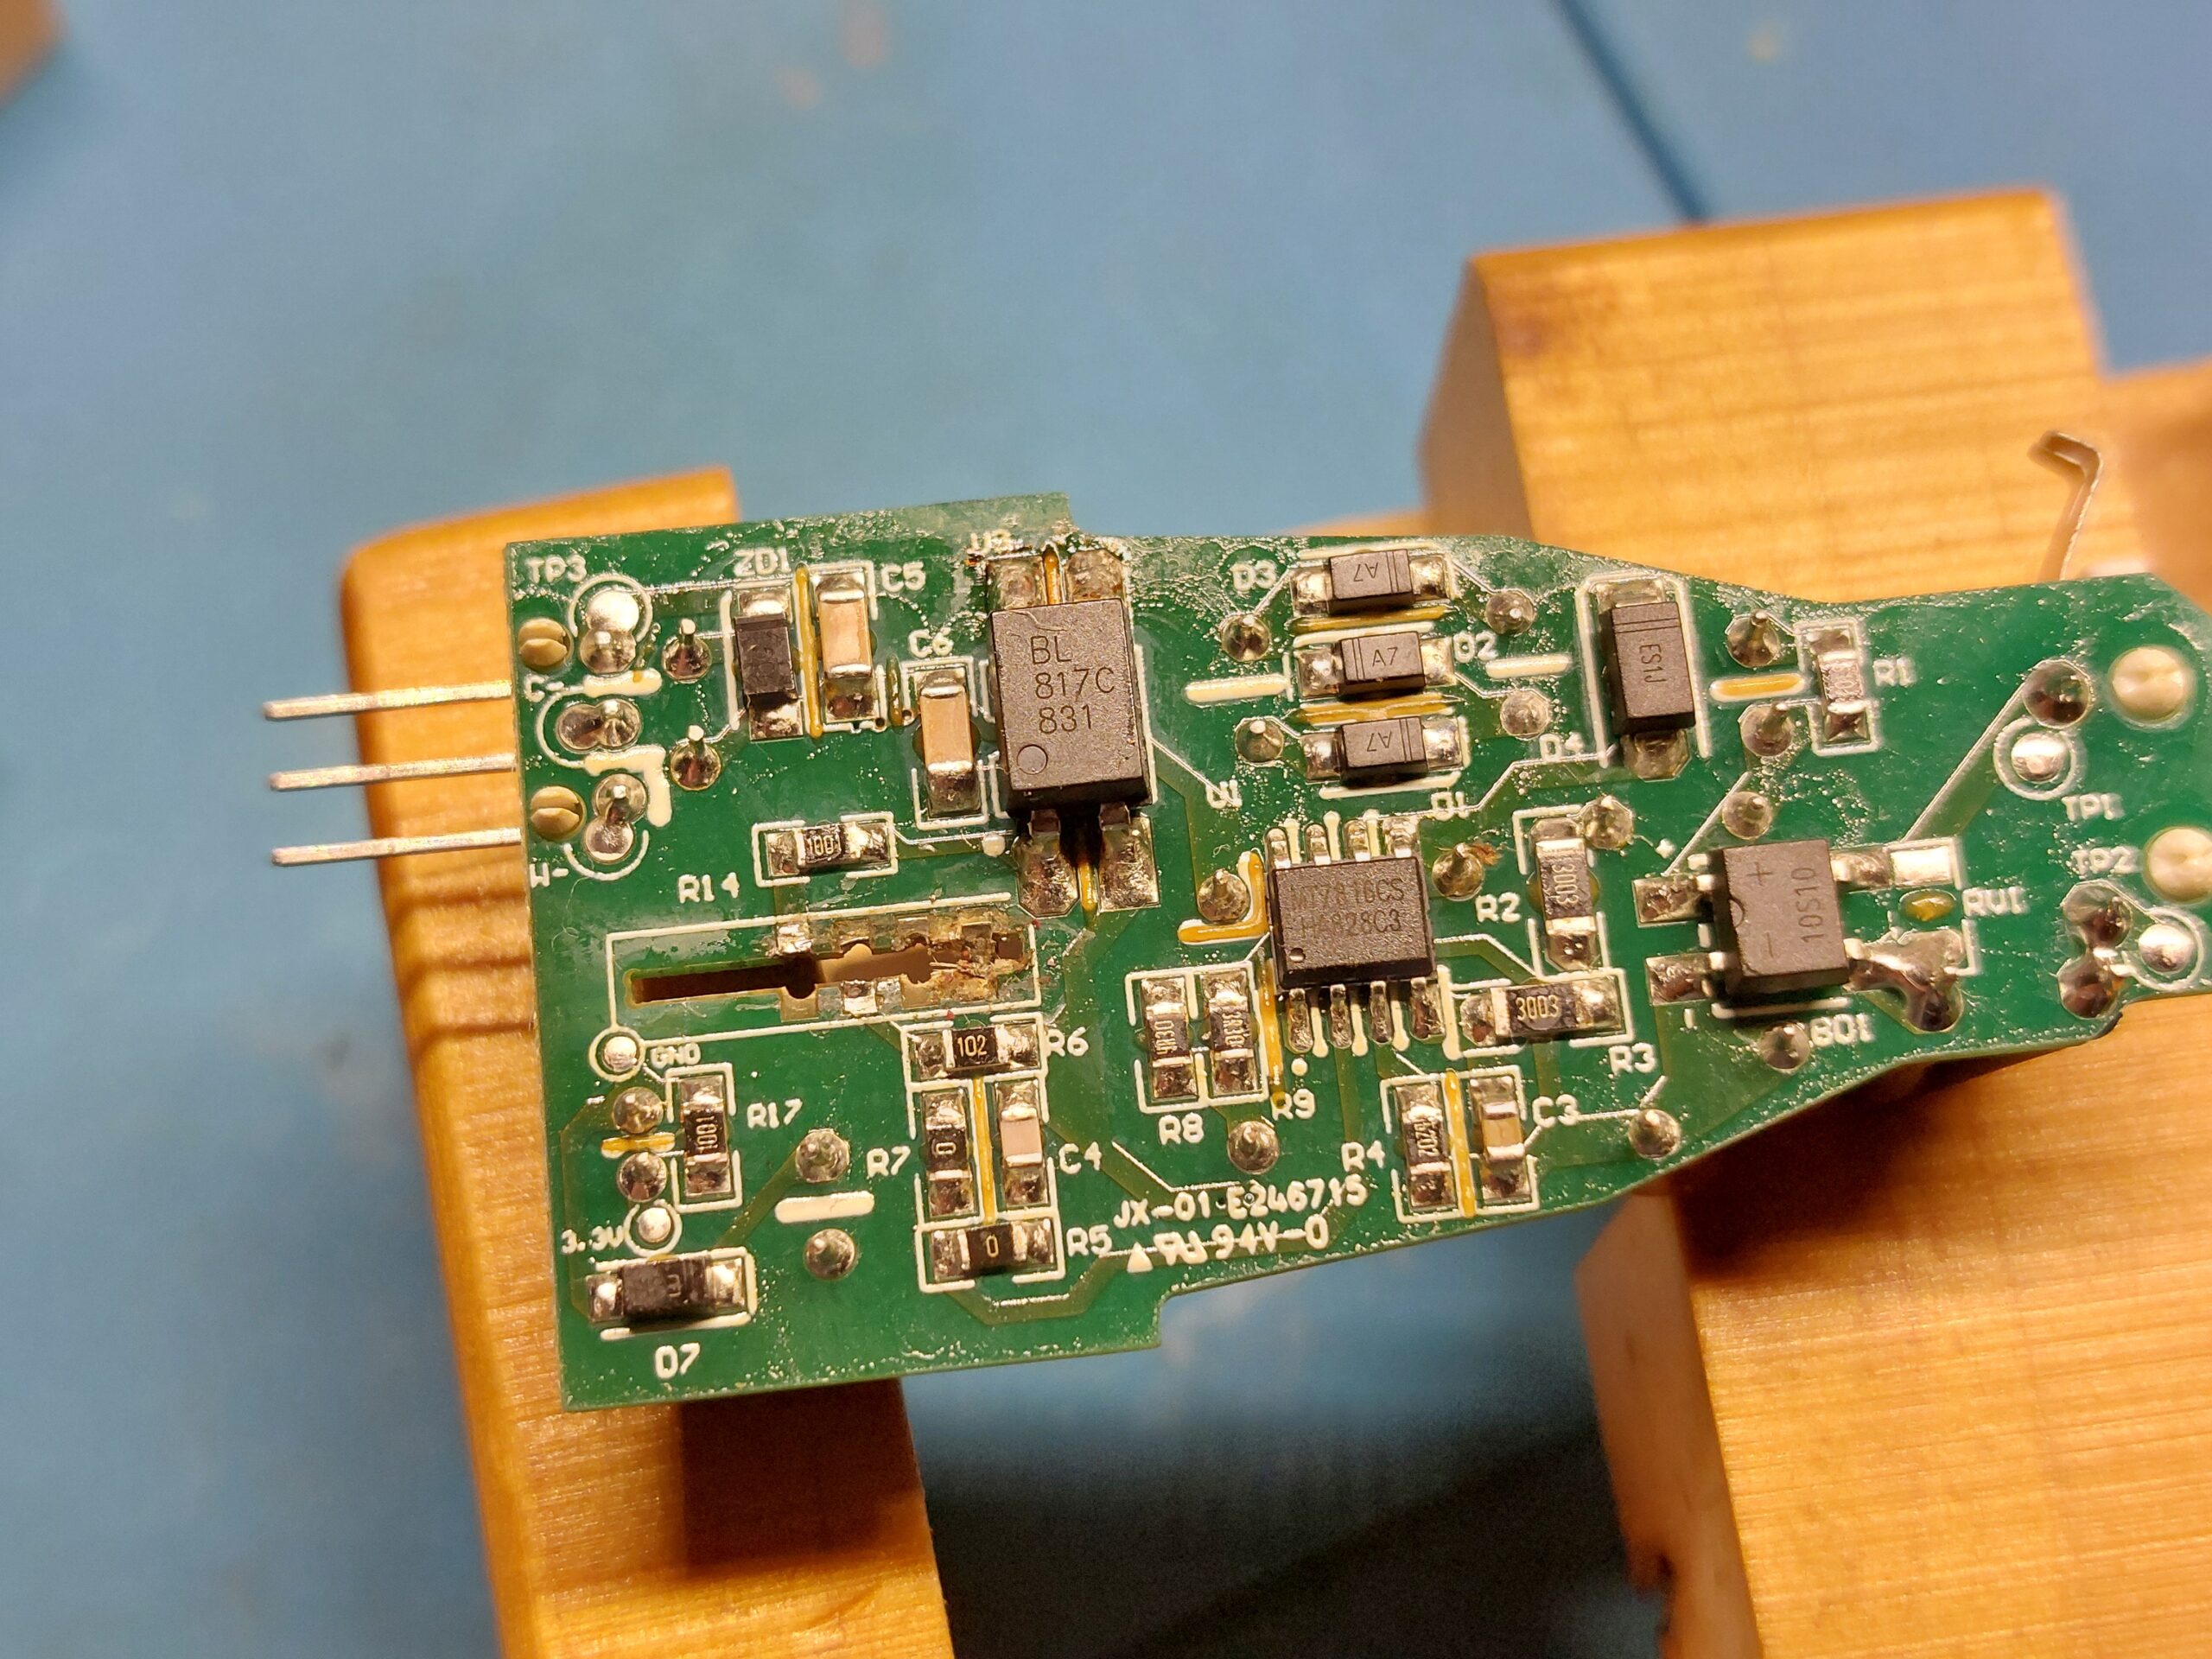
The disassembly was easy because the light bulb is extremely well made: a a top PCB which hosts all the LEDs and connected to the power PCB using proper connector, without soldering it in place. The PCB with the power supply is also not soldered to the E27 socket, as often is the case, but it has a sliding contact which allows removal and replacement without any damage.
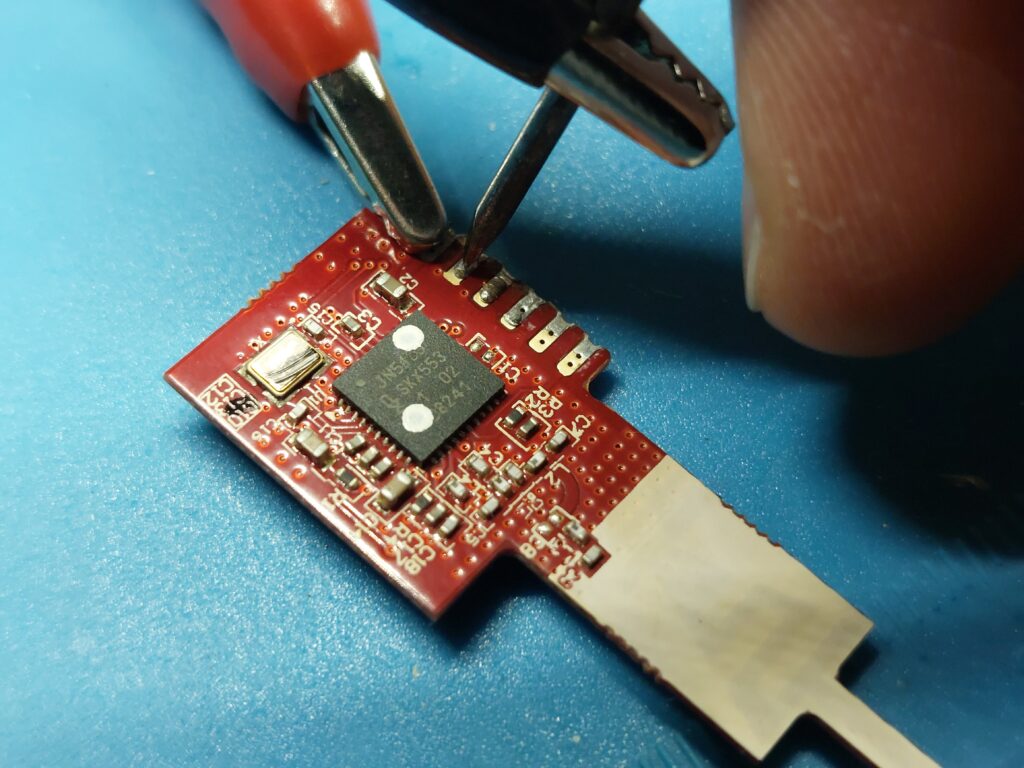
The Zigbee module is the only one soldered to the power supply PCB. It shows
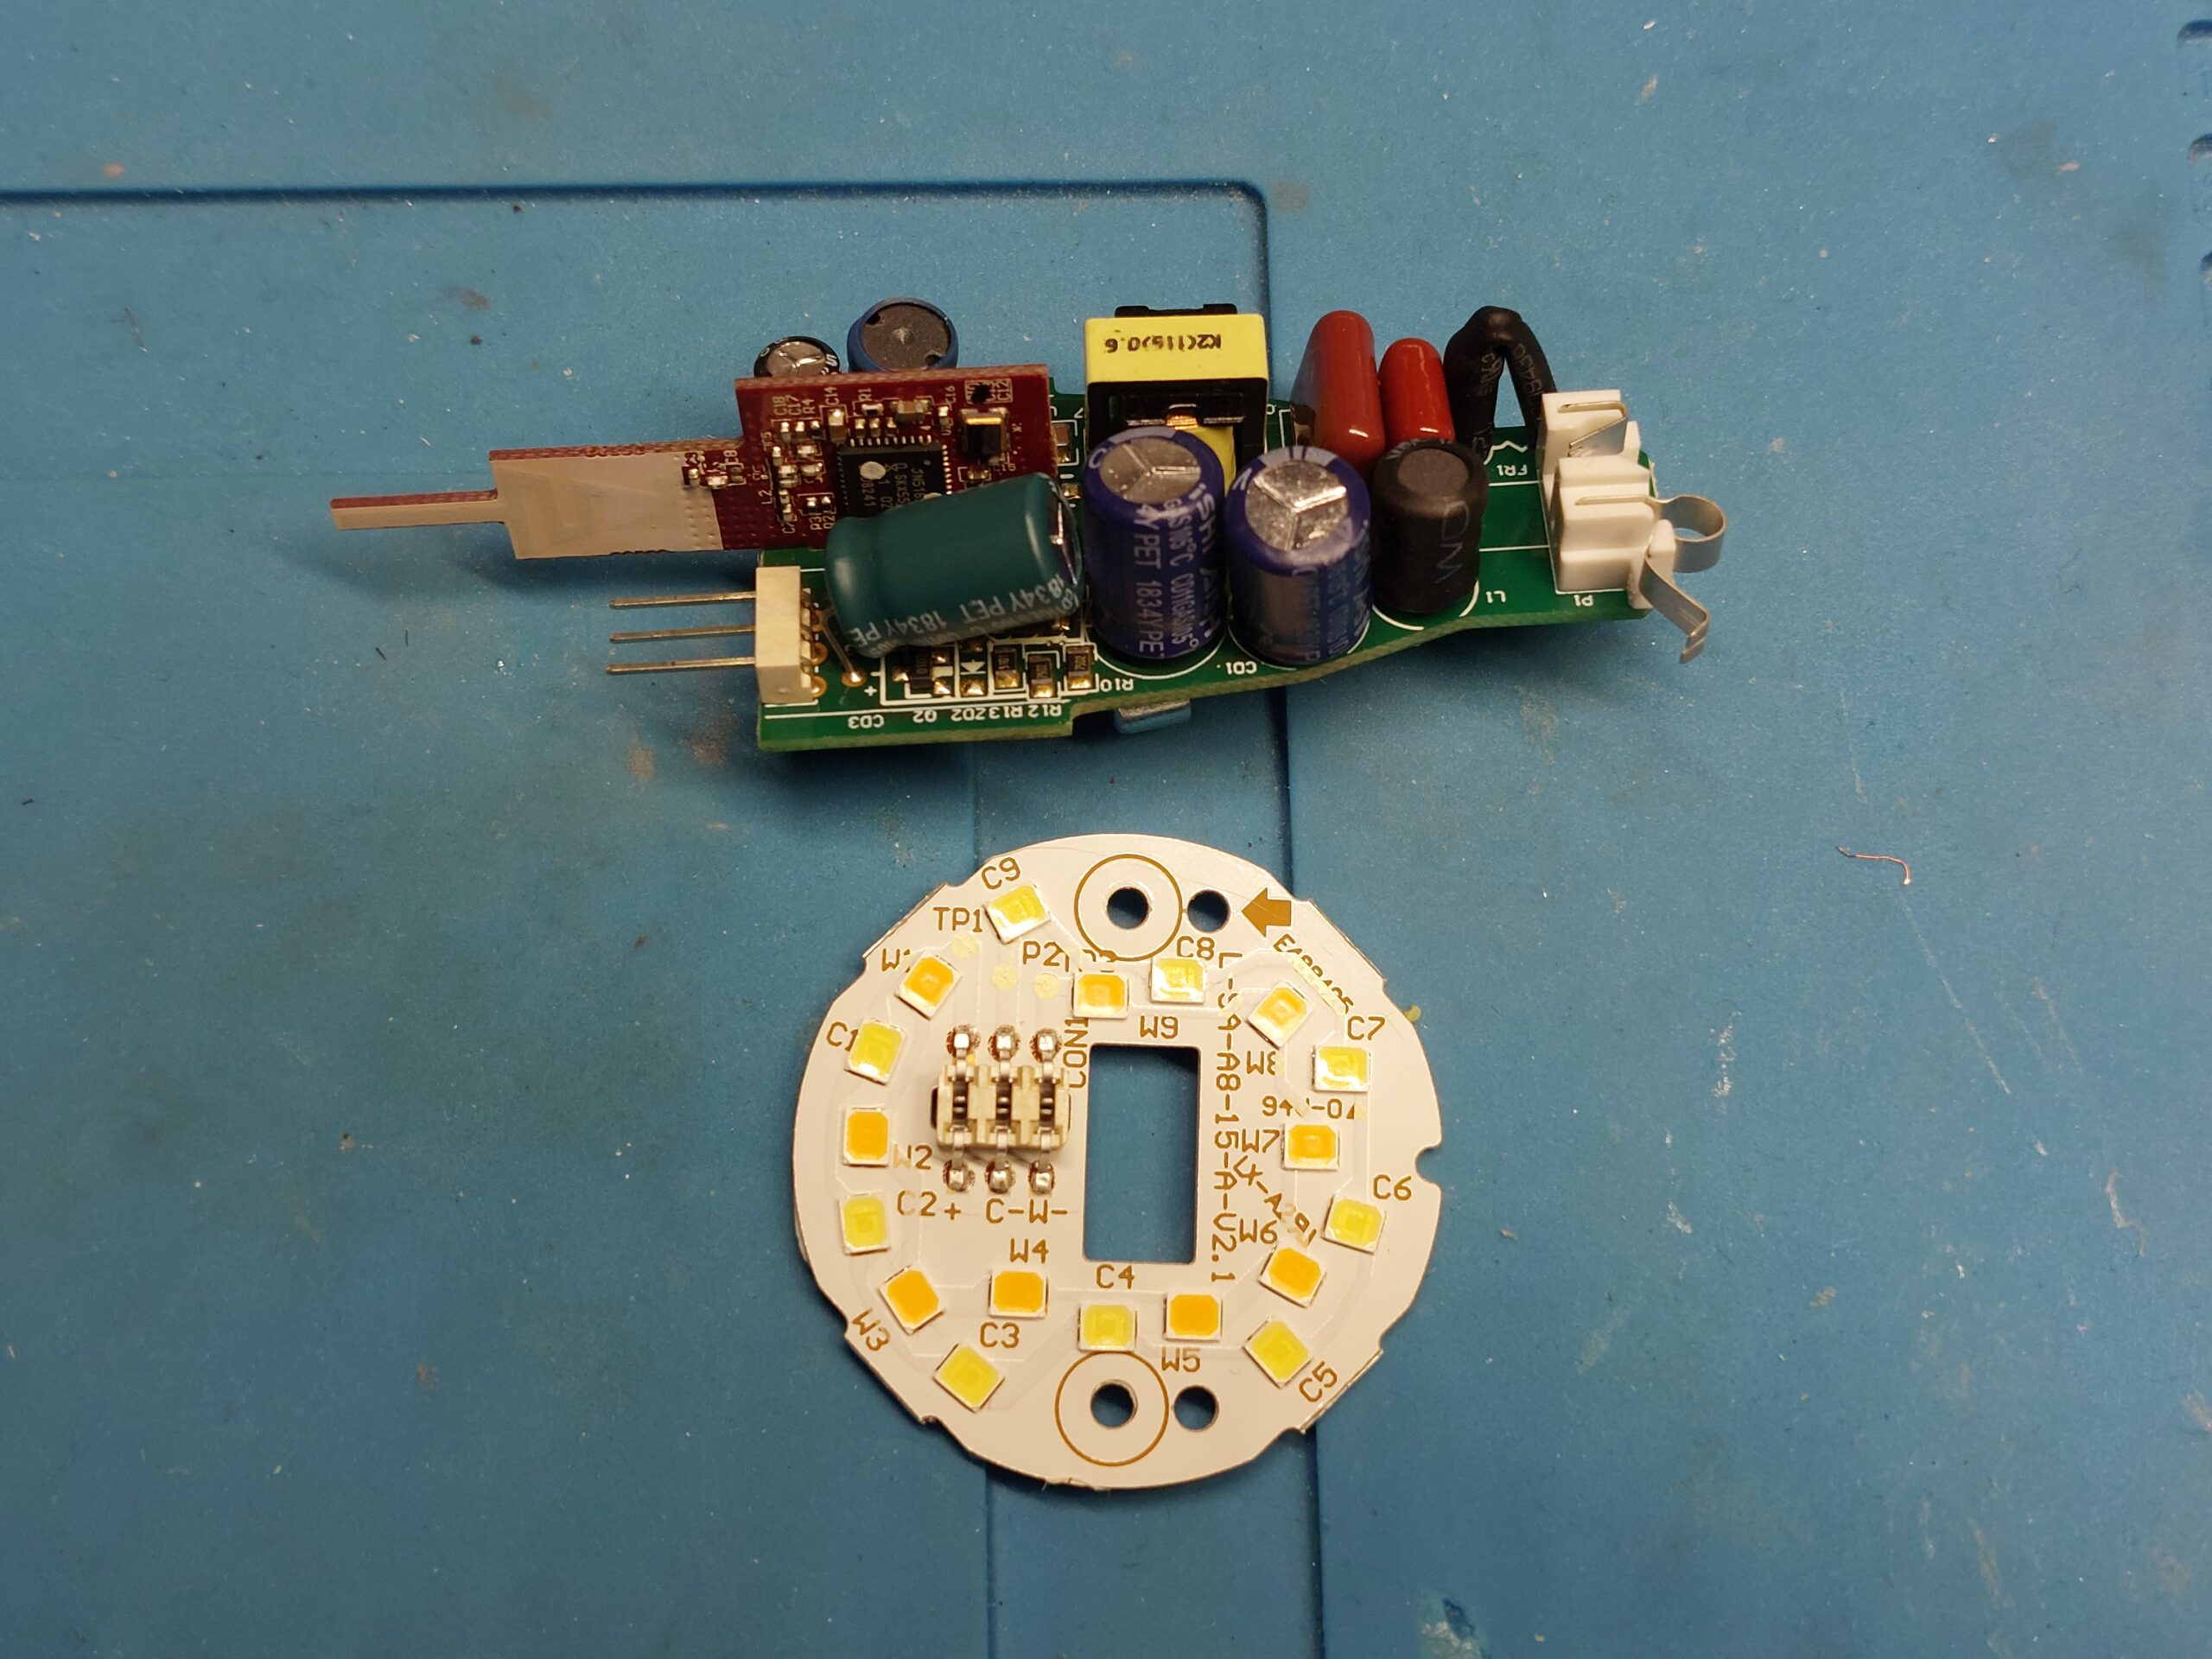
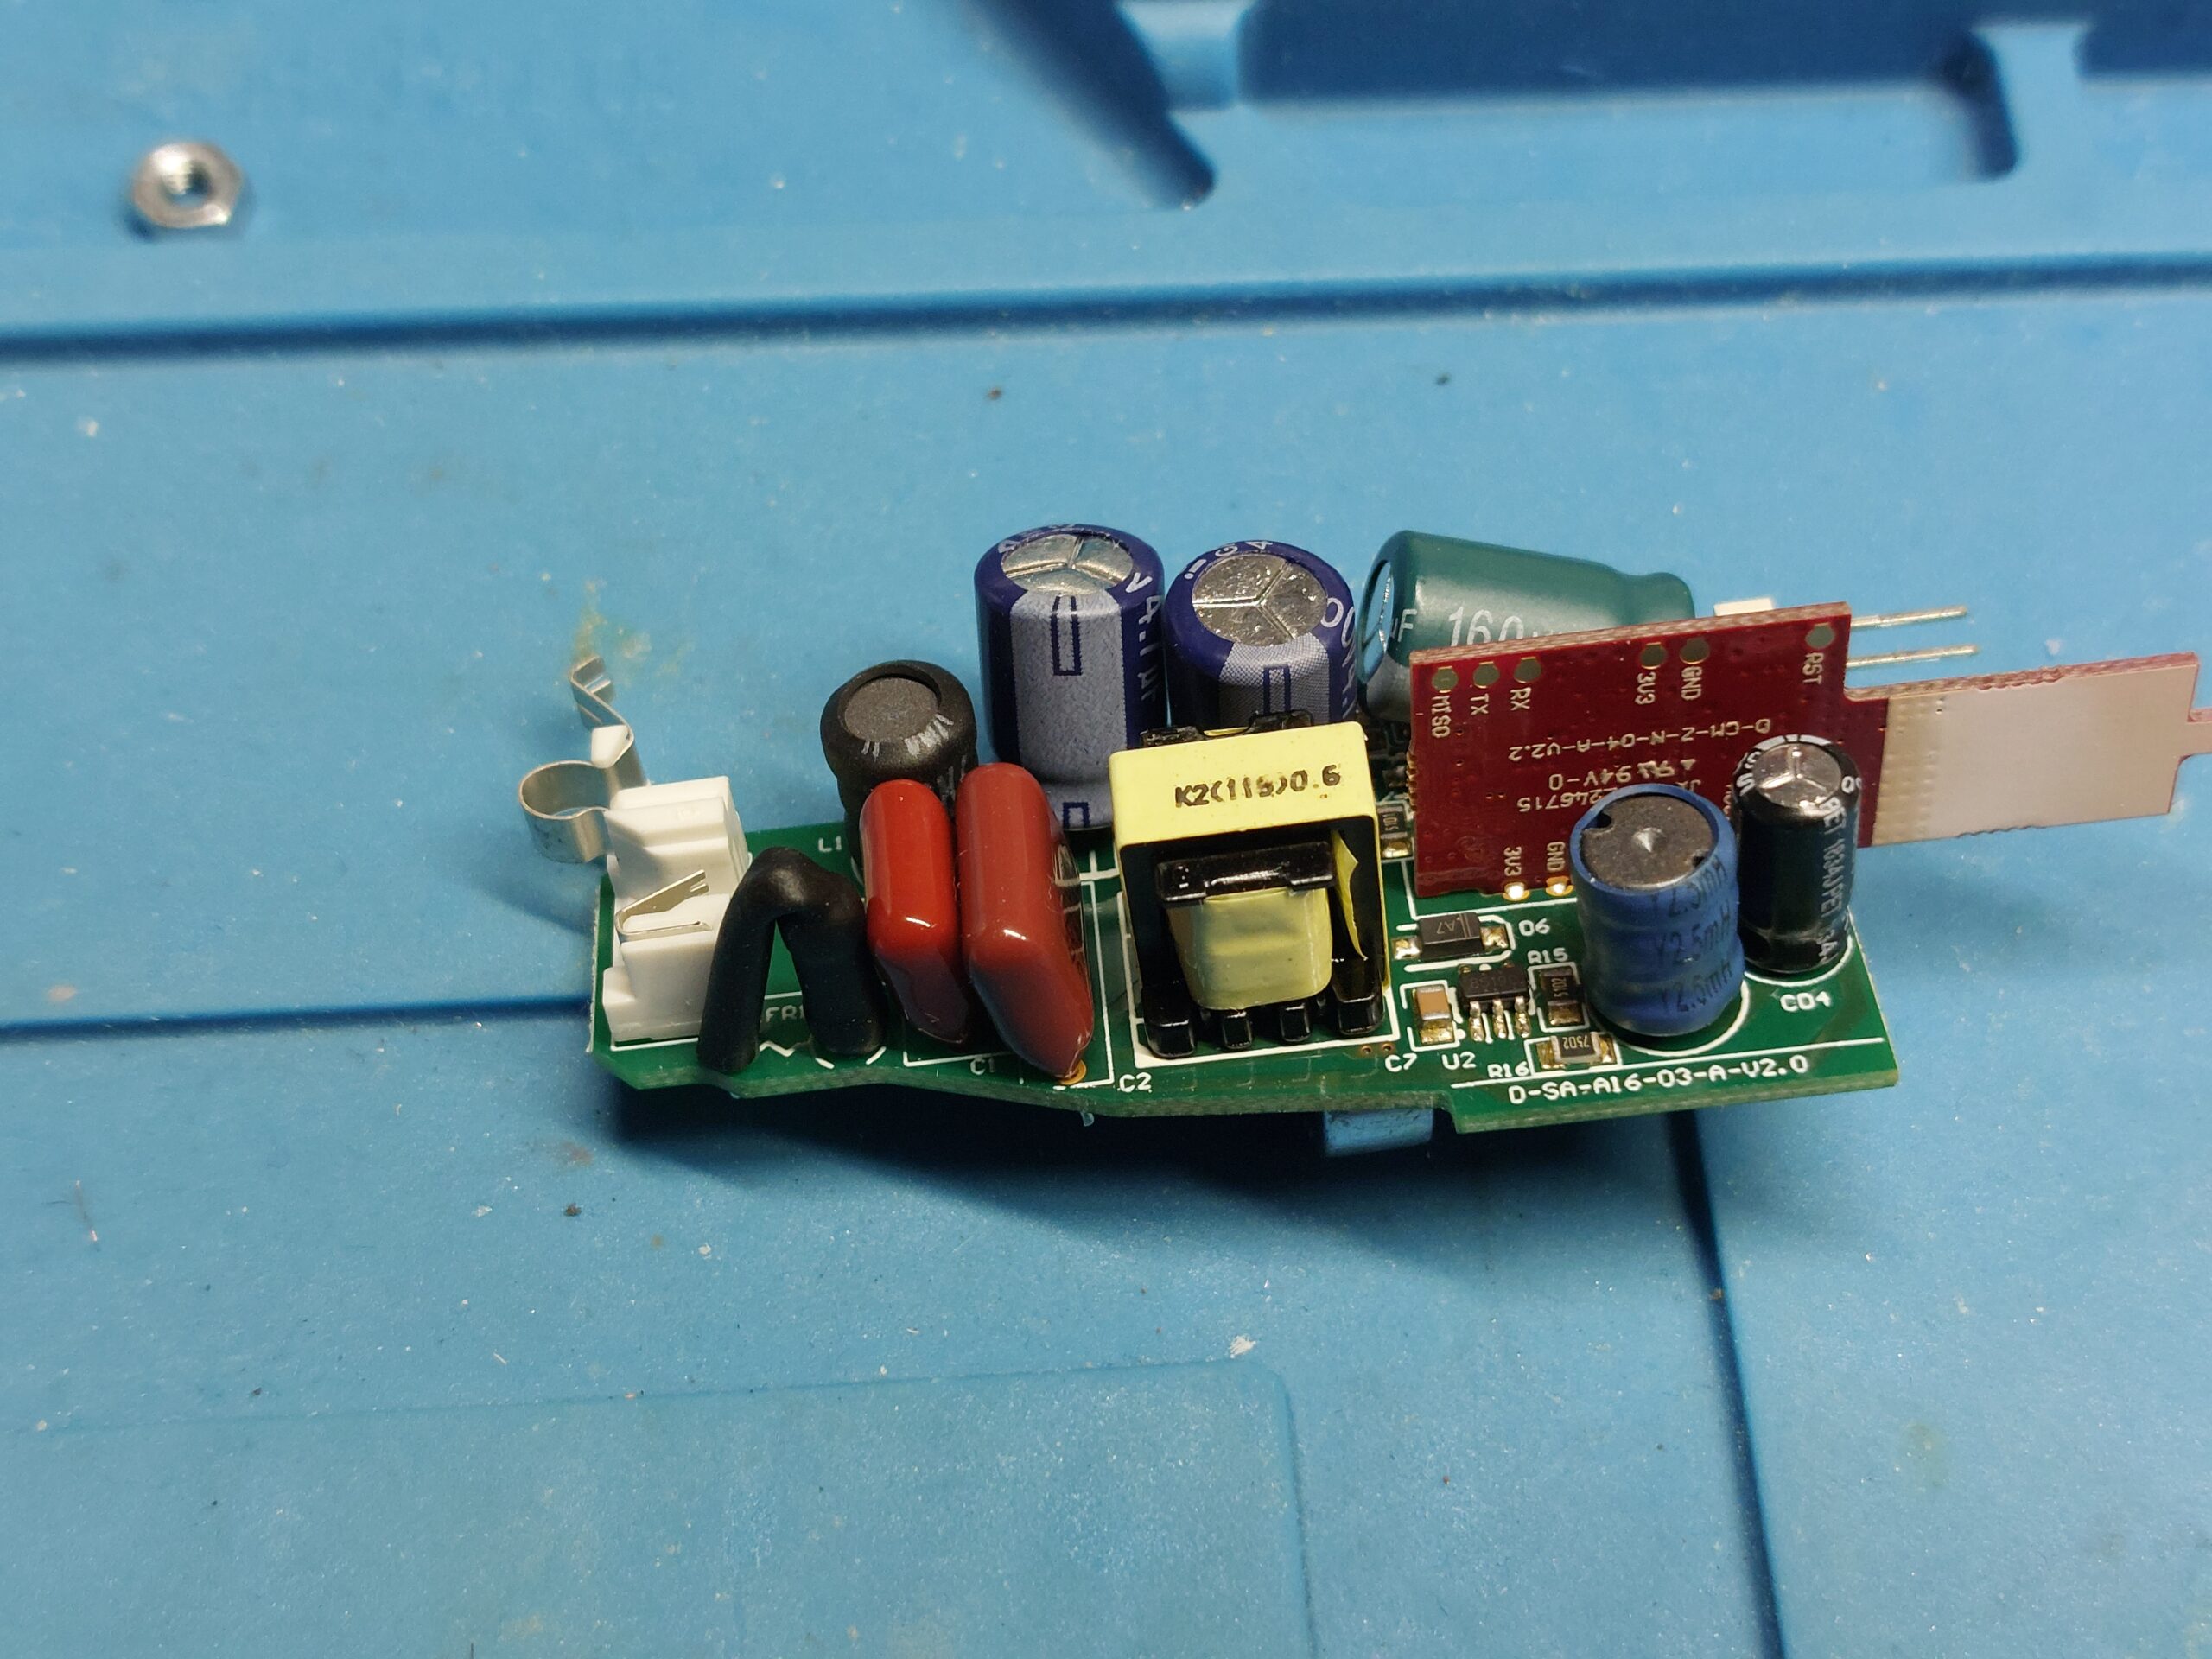
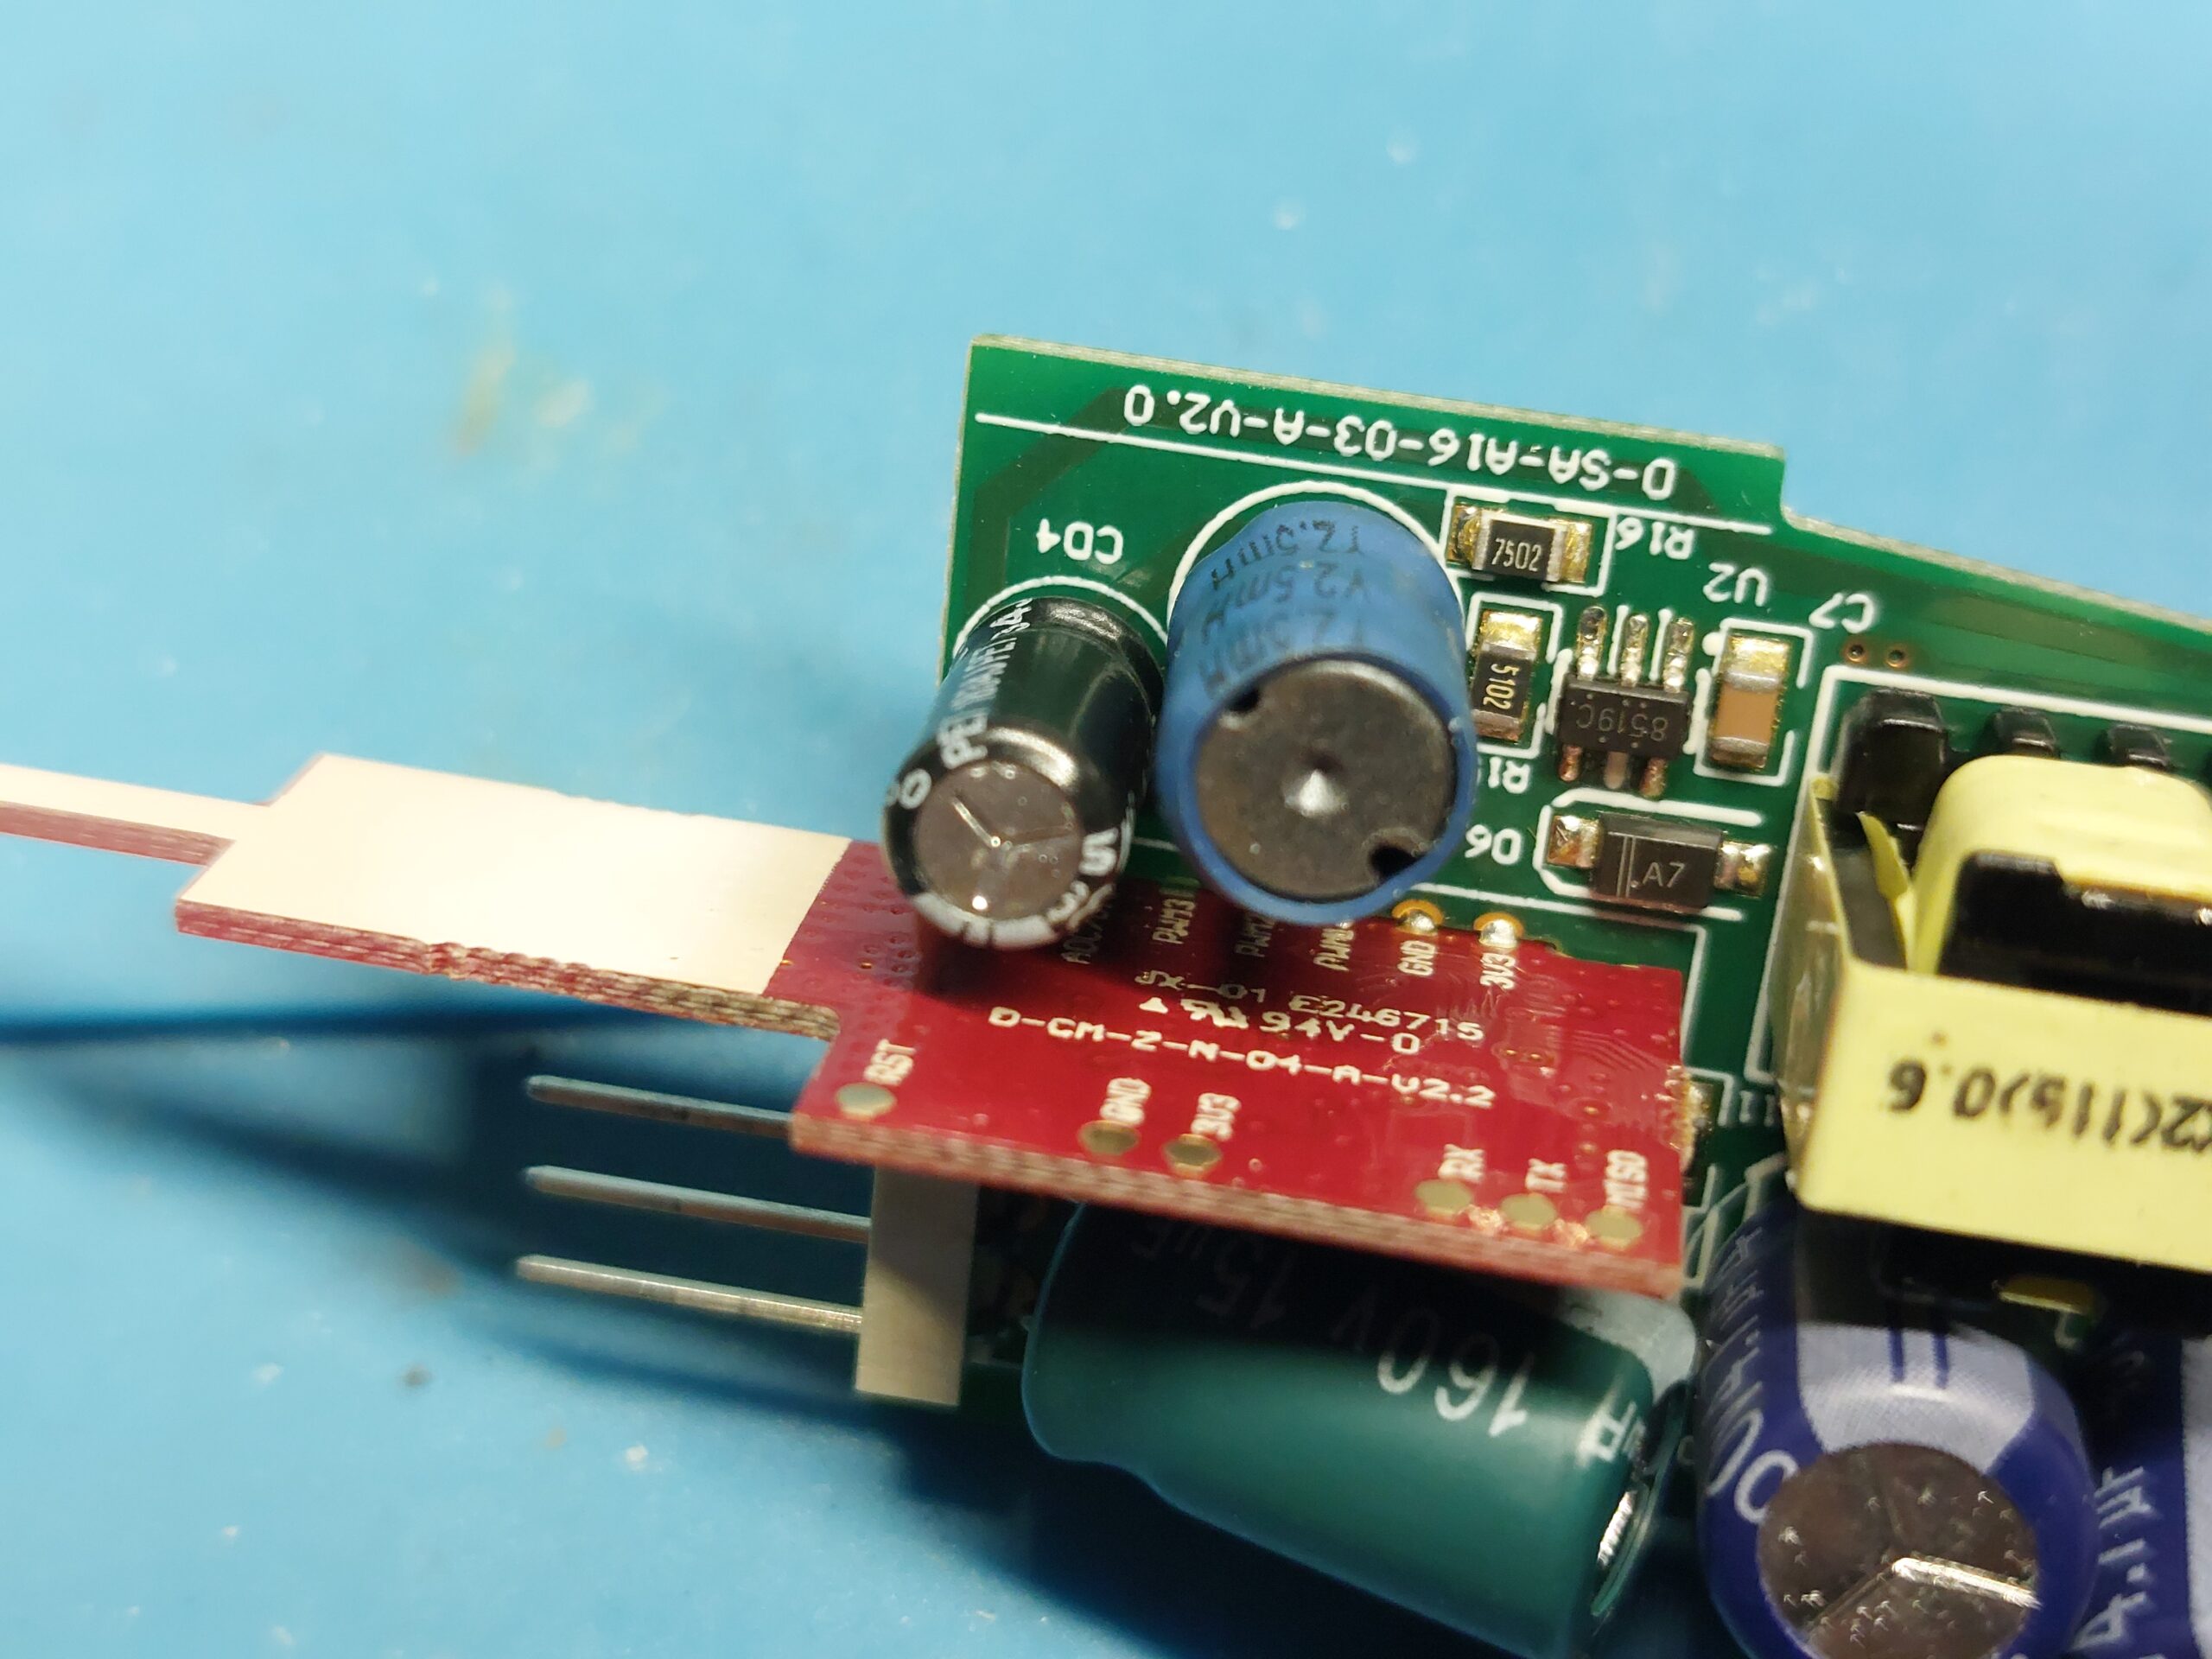
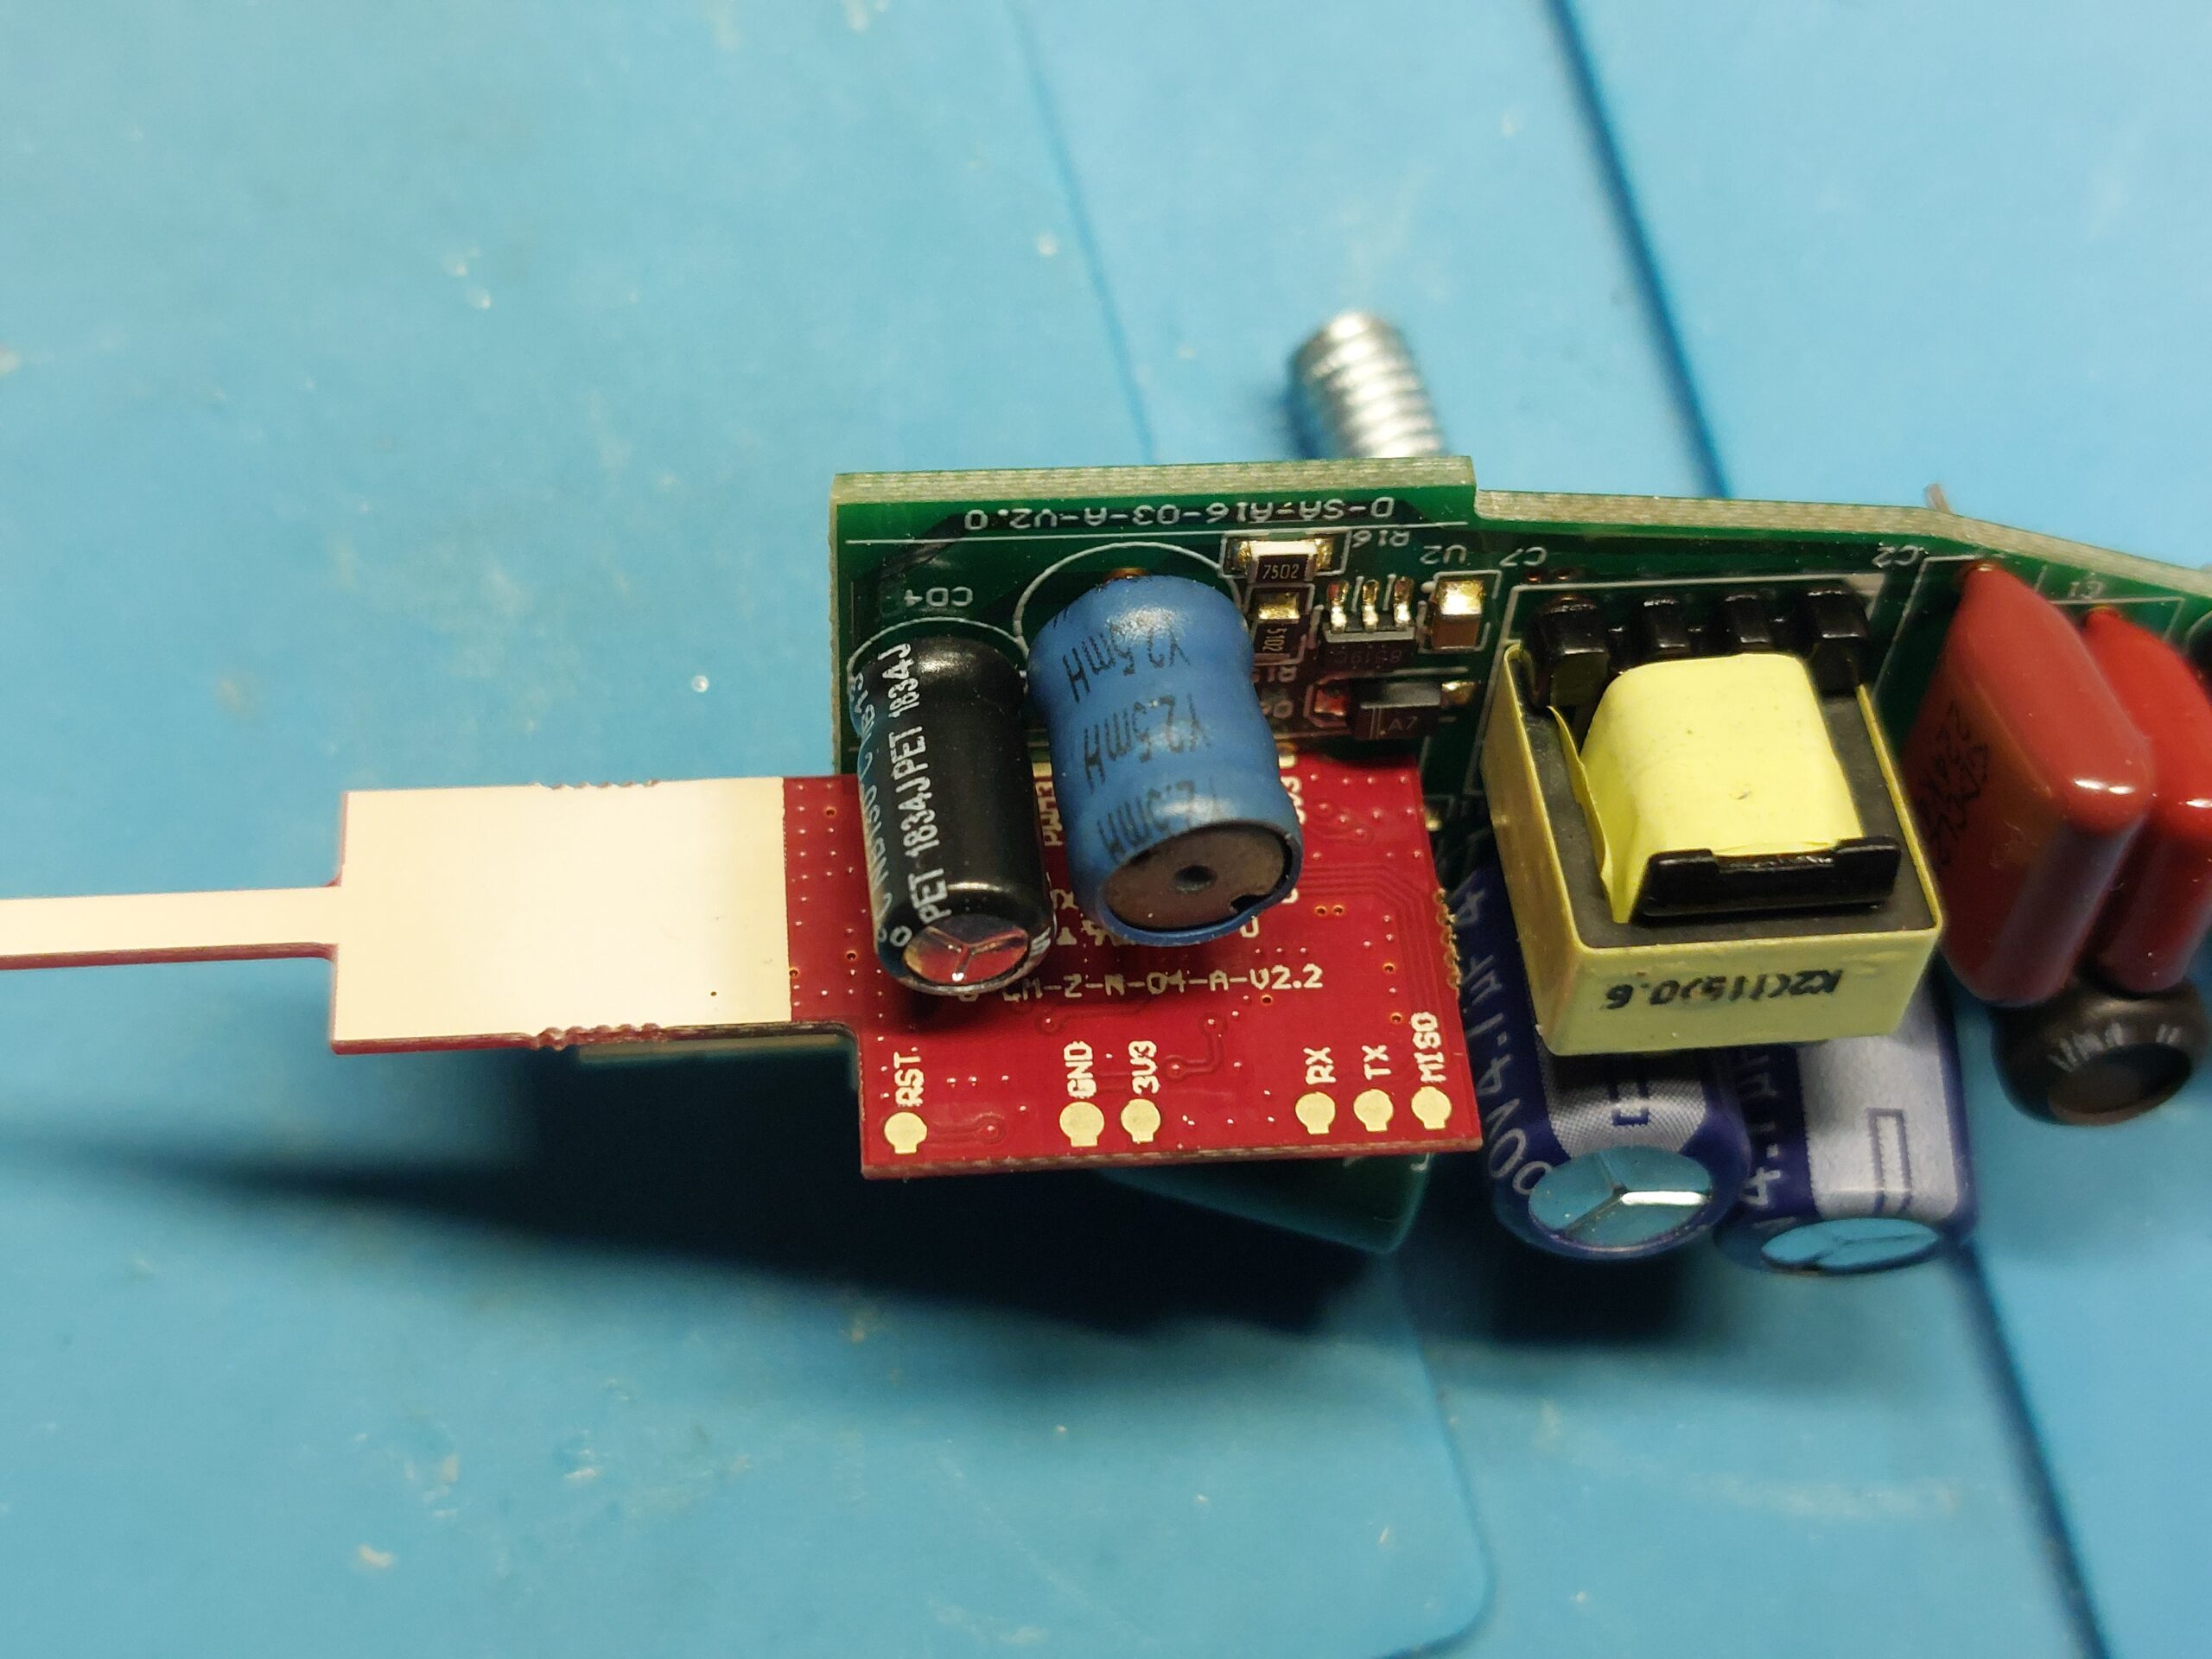
Removing the Zigbee module required some minor damage to the mainboard.
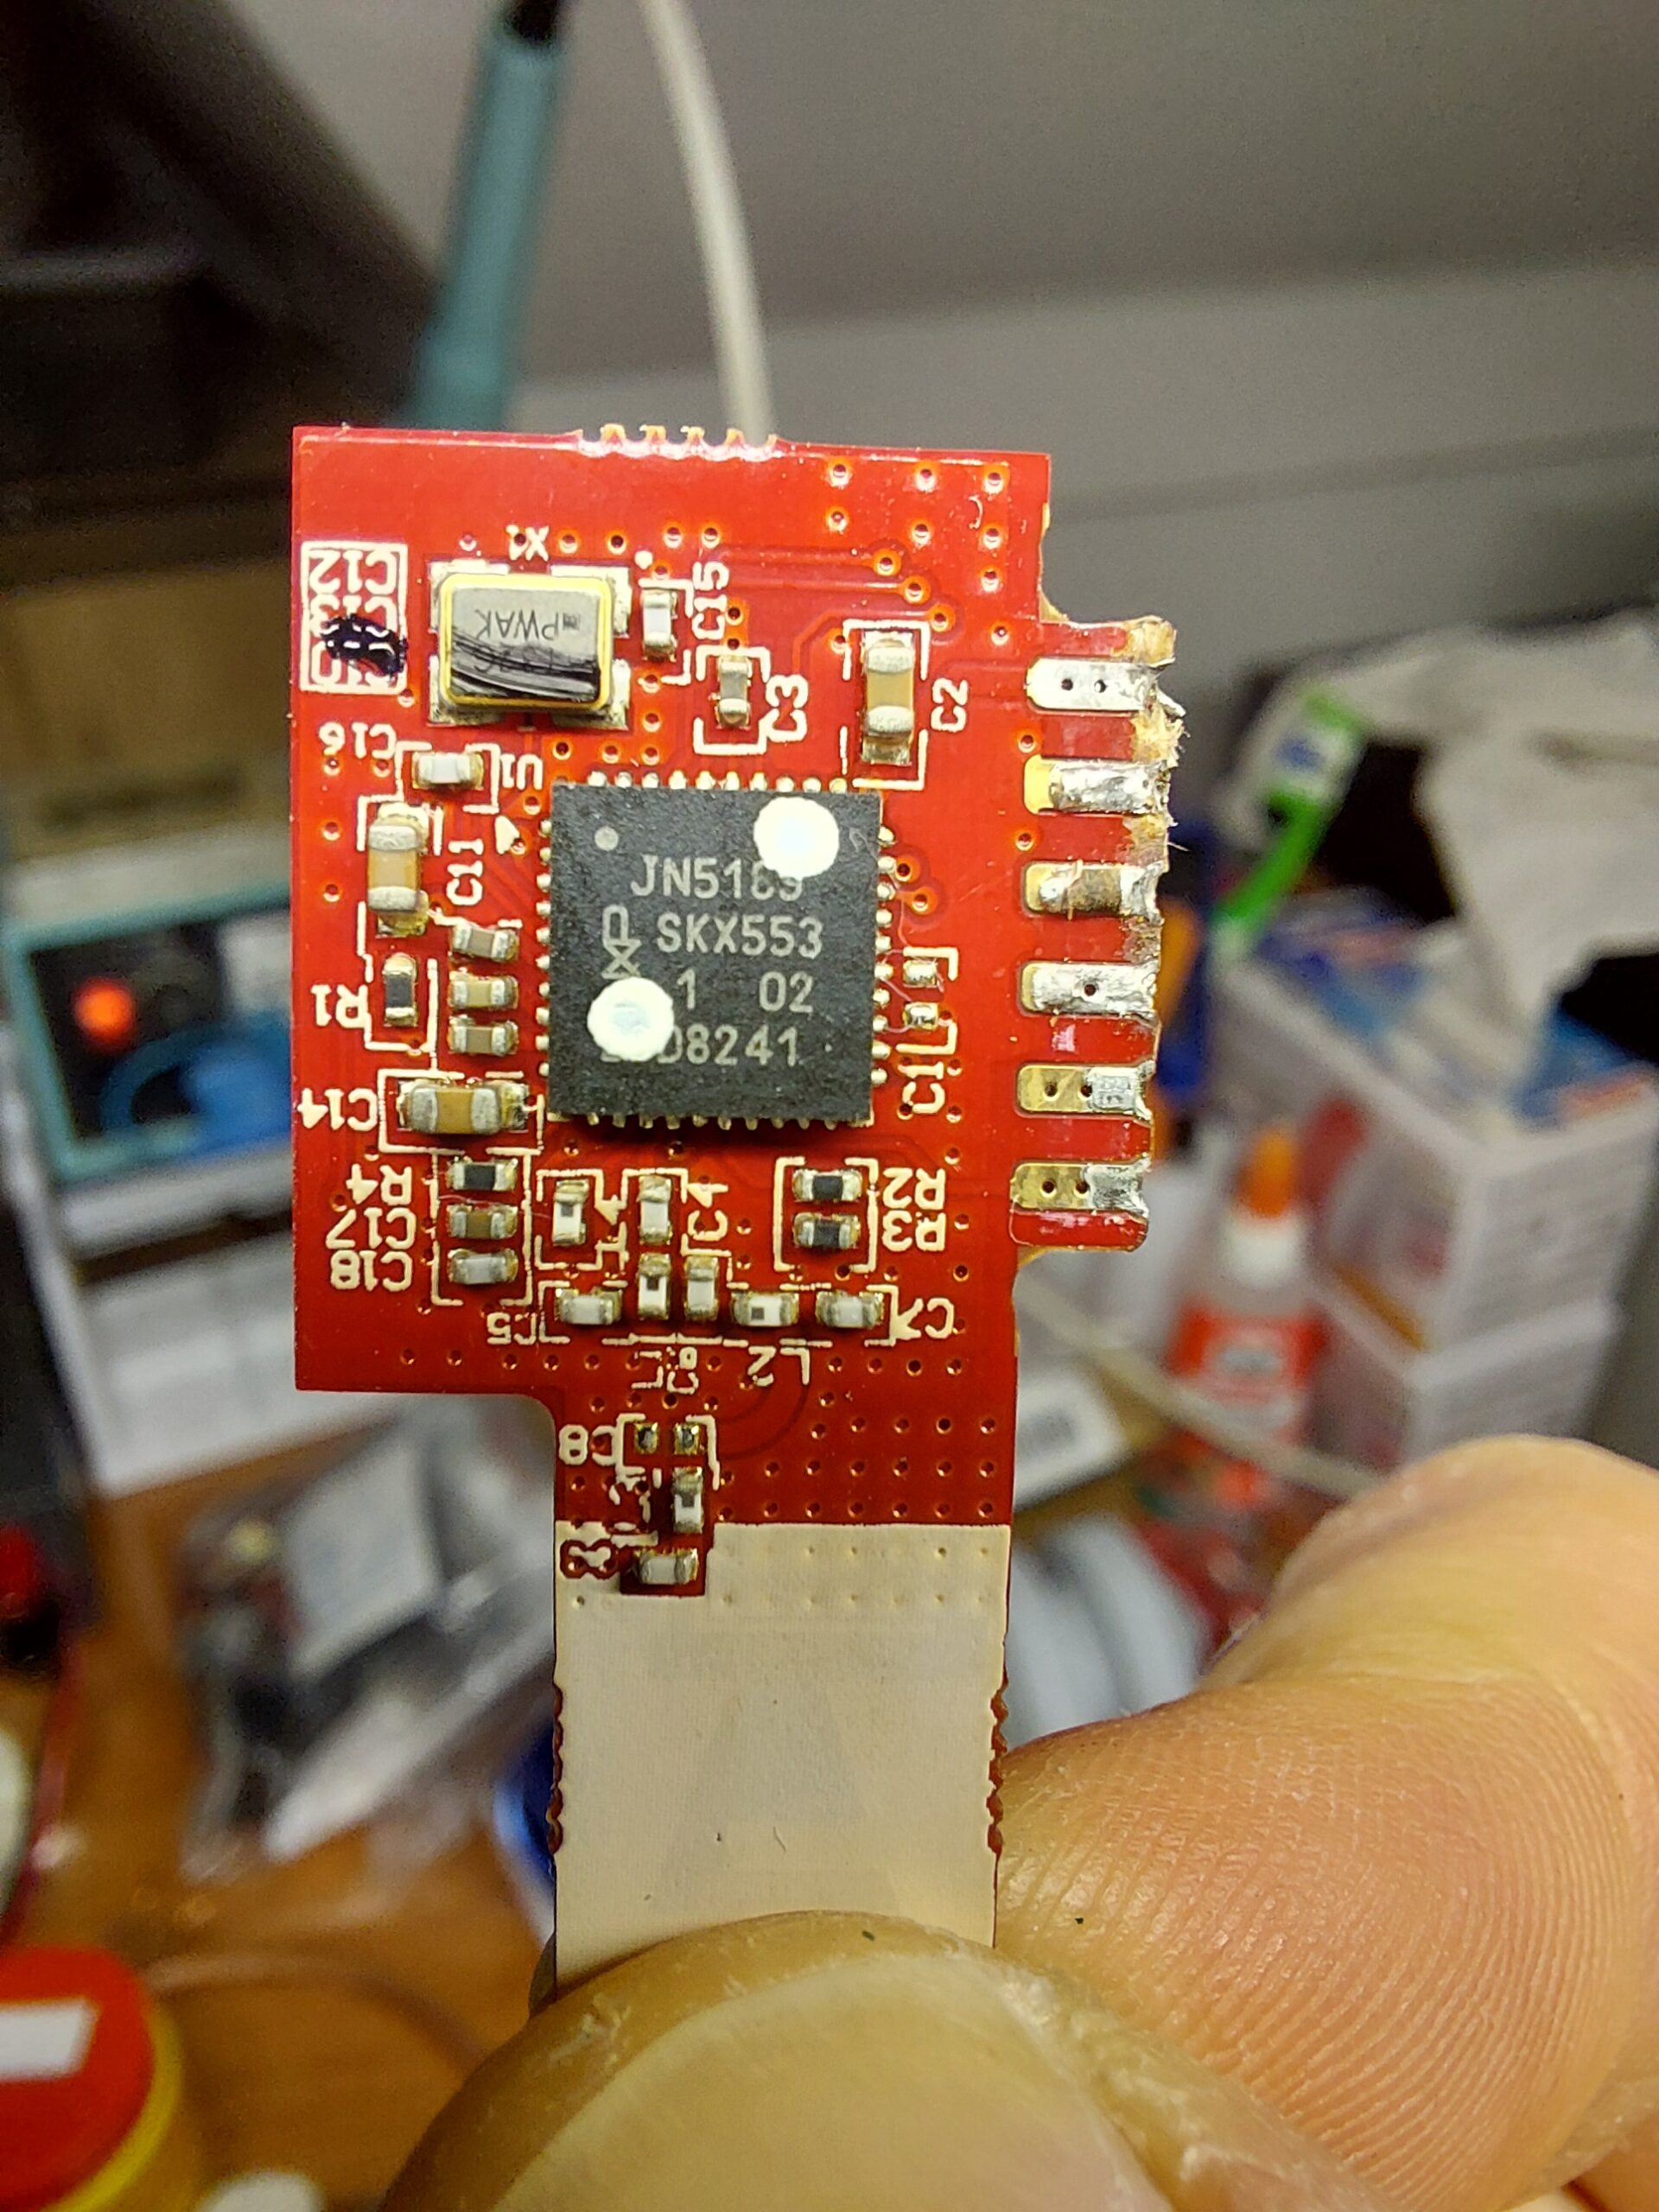
The Zigbee module has PWM two outputs used out of the three available: one controls the brightness, one controls the colour temperature, cycling it between 2700 K and 6500 K.
Solution tried
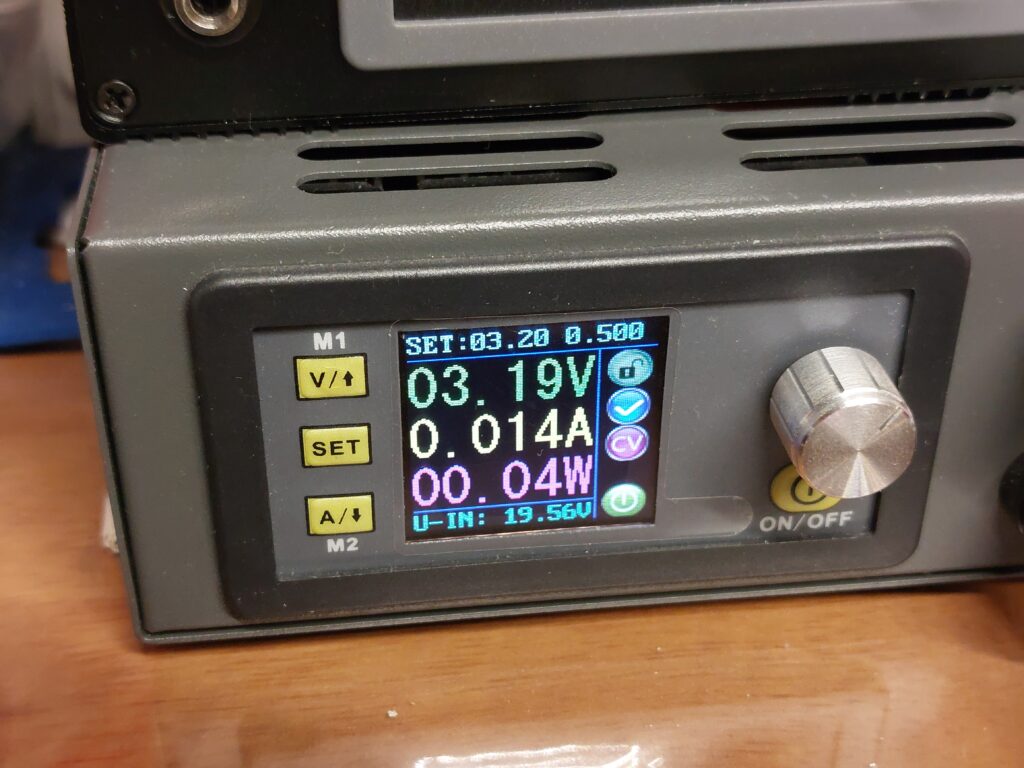
I tested the Zigbee module and the current consumption is 14 mA.
I decided to try to replace the functionality of the Zigbee module with a ESP8266 module running ESPhome, which can run with less than 14 mA when the appropriate power saving is used.
I was planning to place the module on the side of the bulb so I use the smallest ESP8266 available.
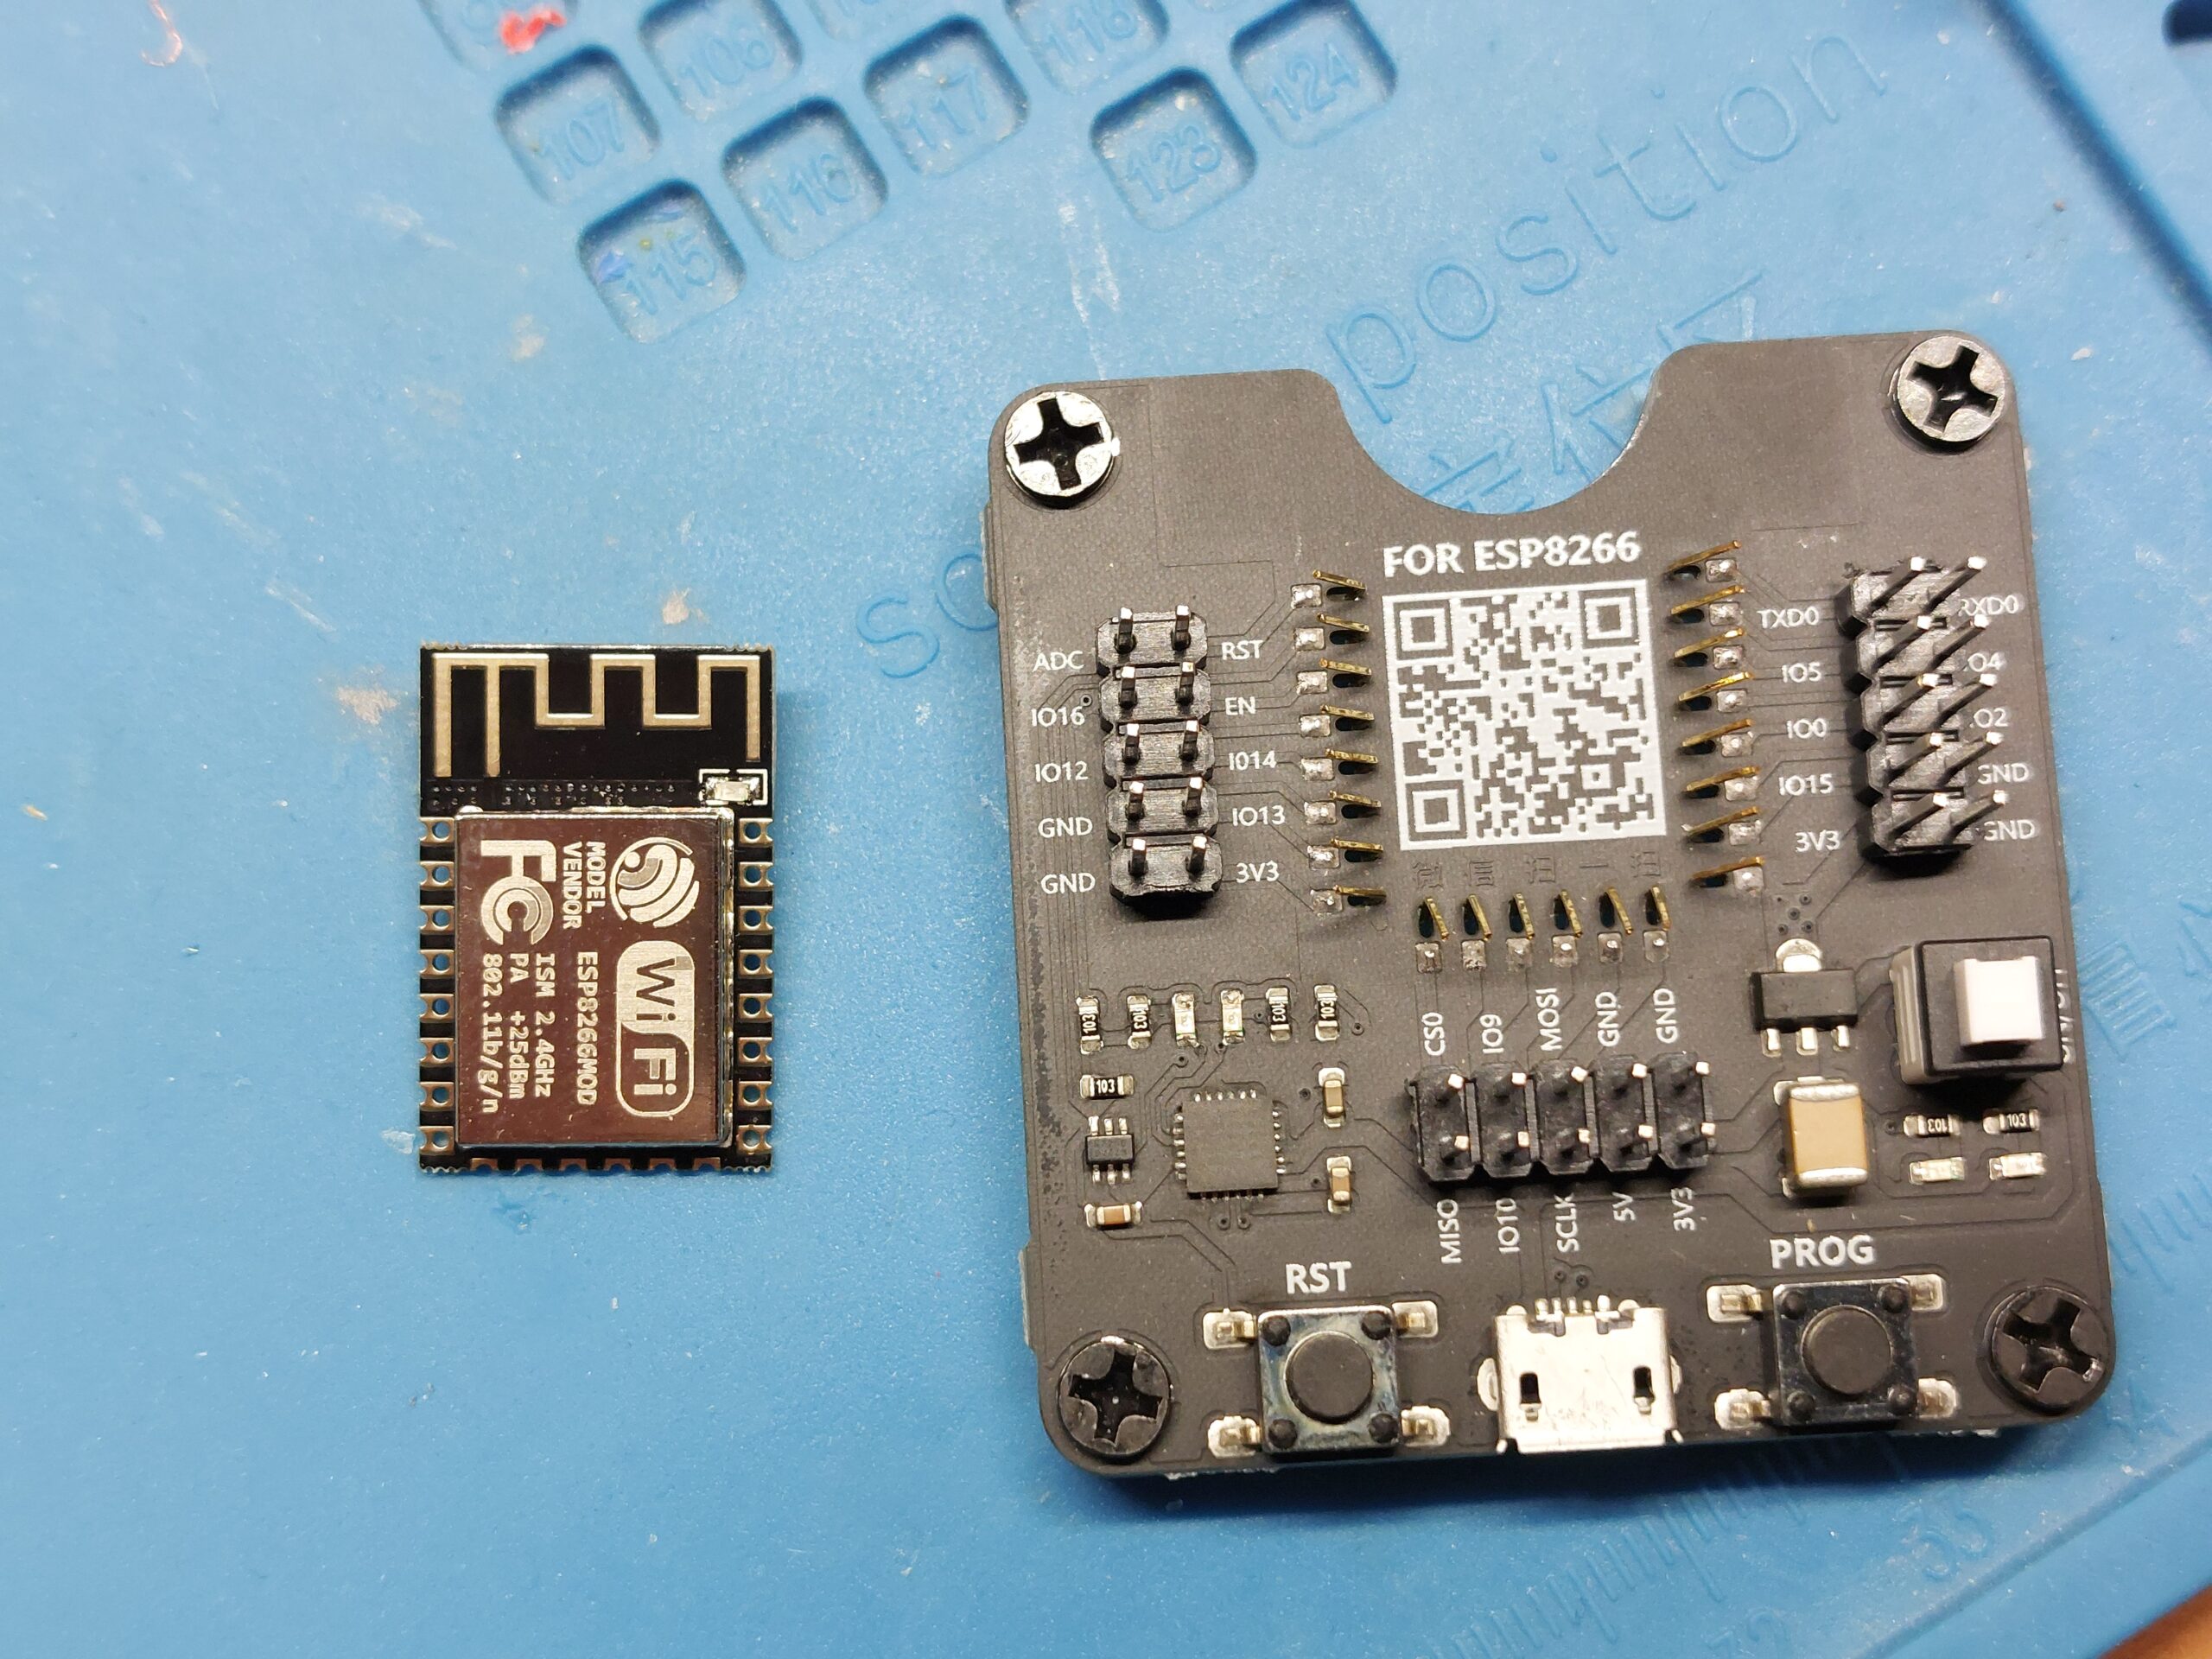

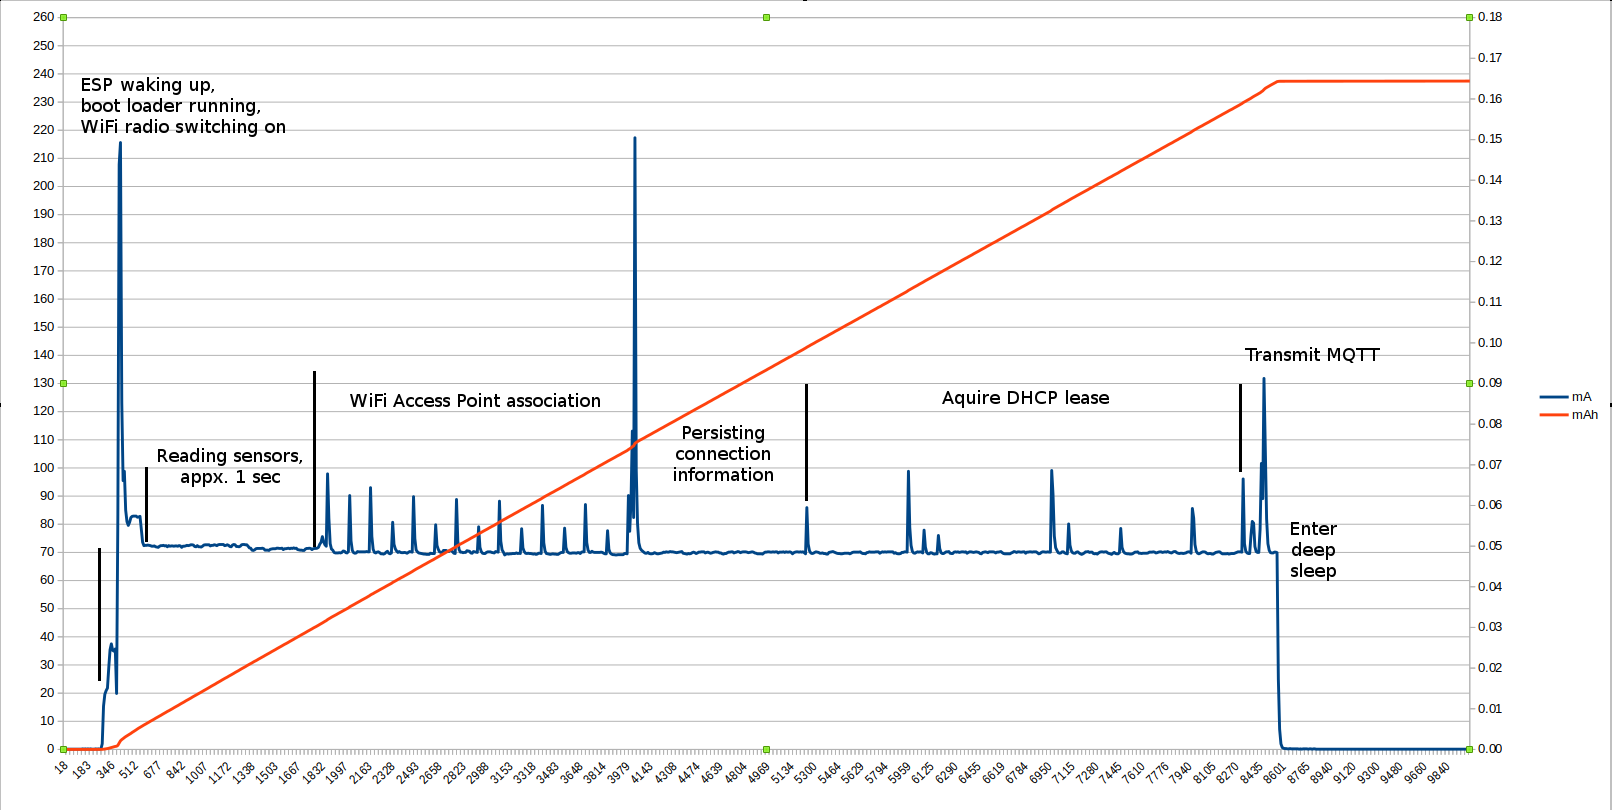
The ESP8266 requires about 80 mA or more for the WiFi initialisation, then dropping to about 10 mA when power_save_mode: LIGHT is used.
Manual IP address was used to speed up the connection and the option fast_connect was enabled.
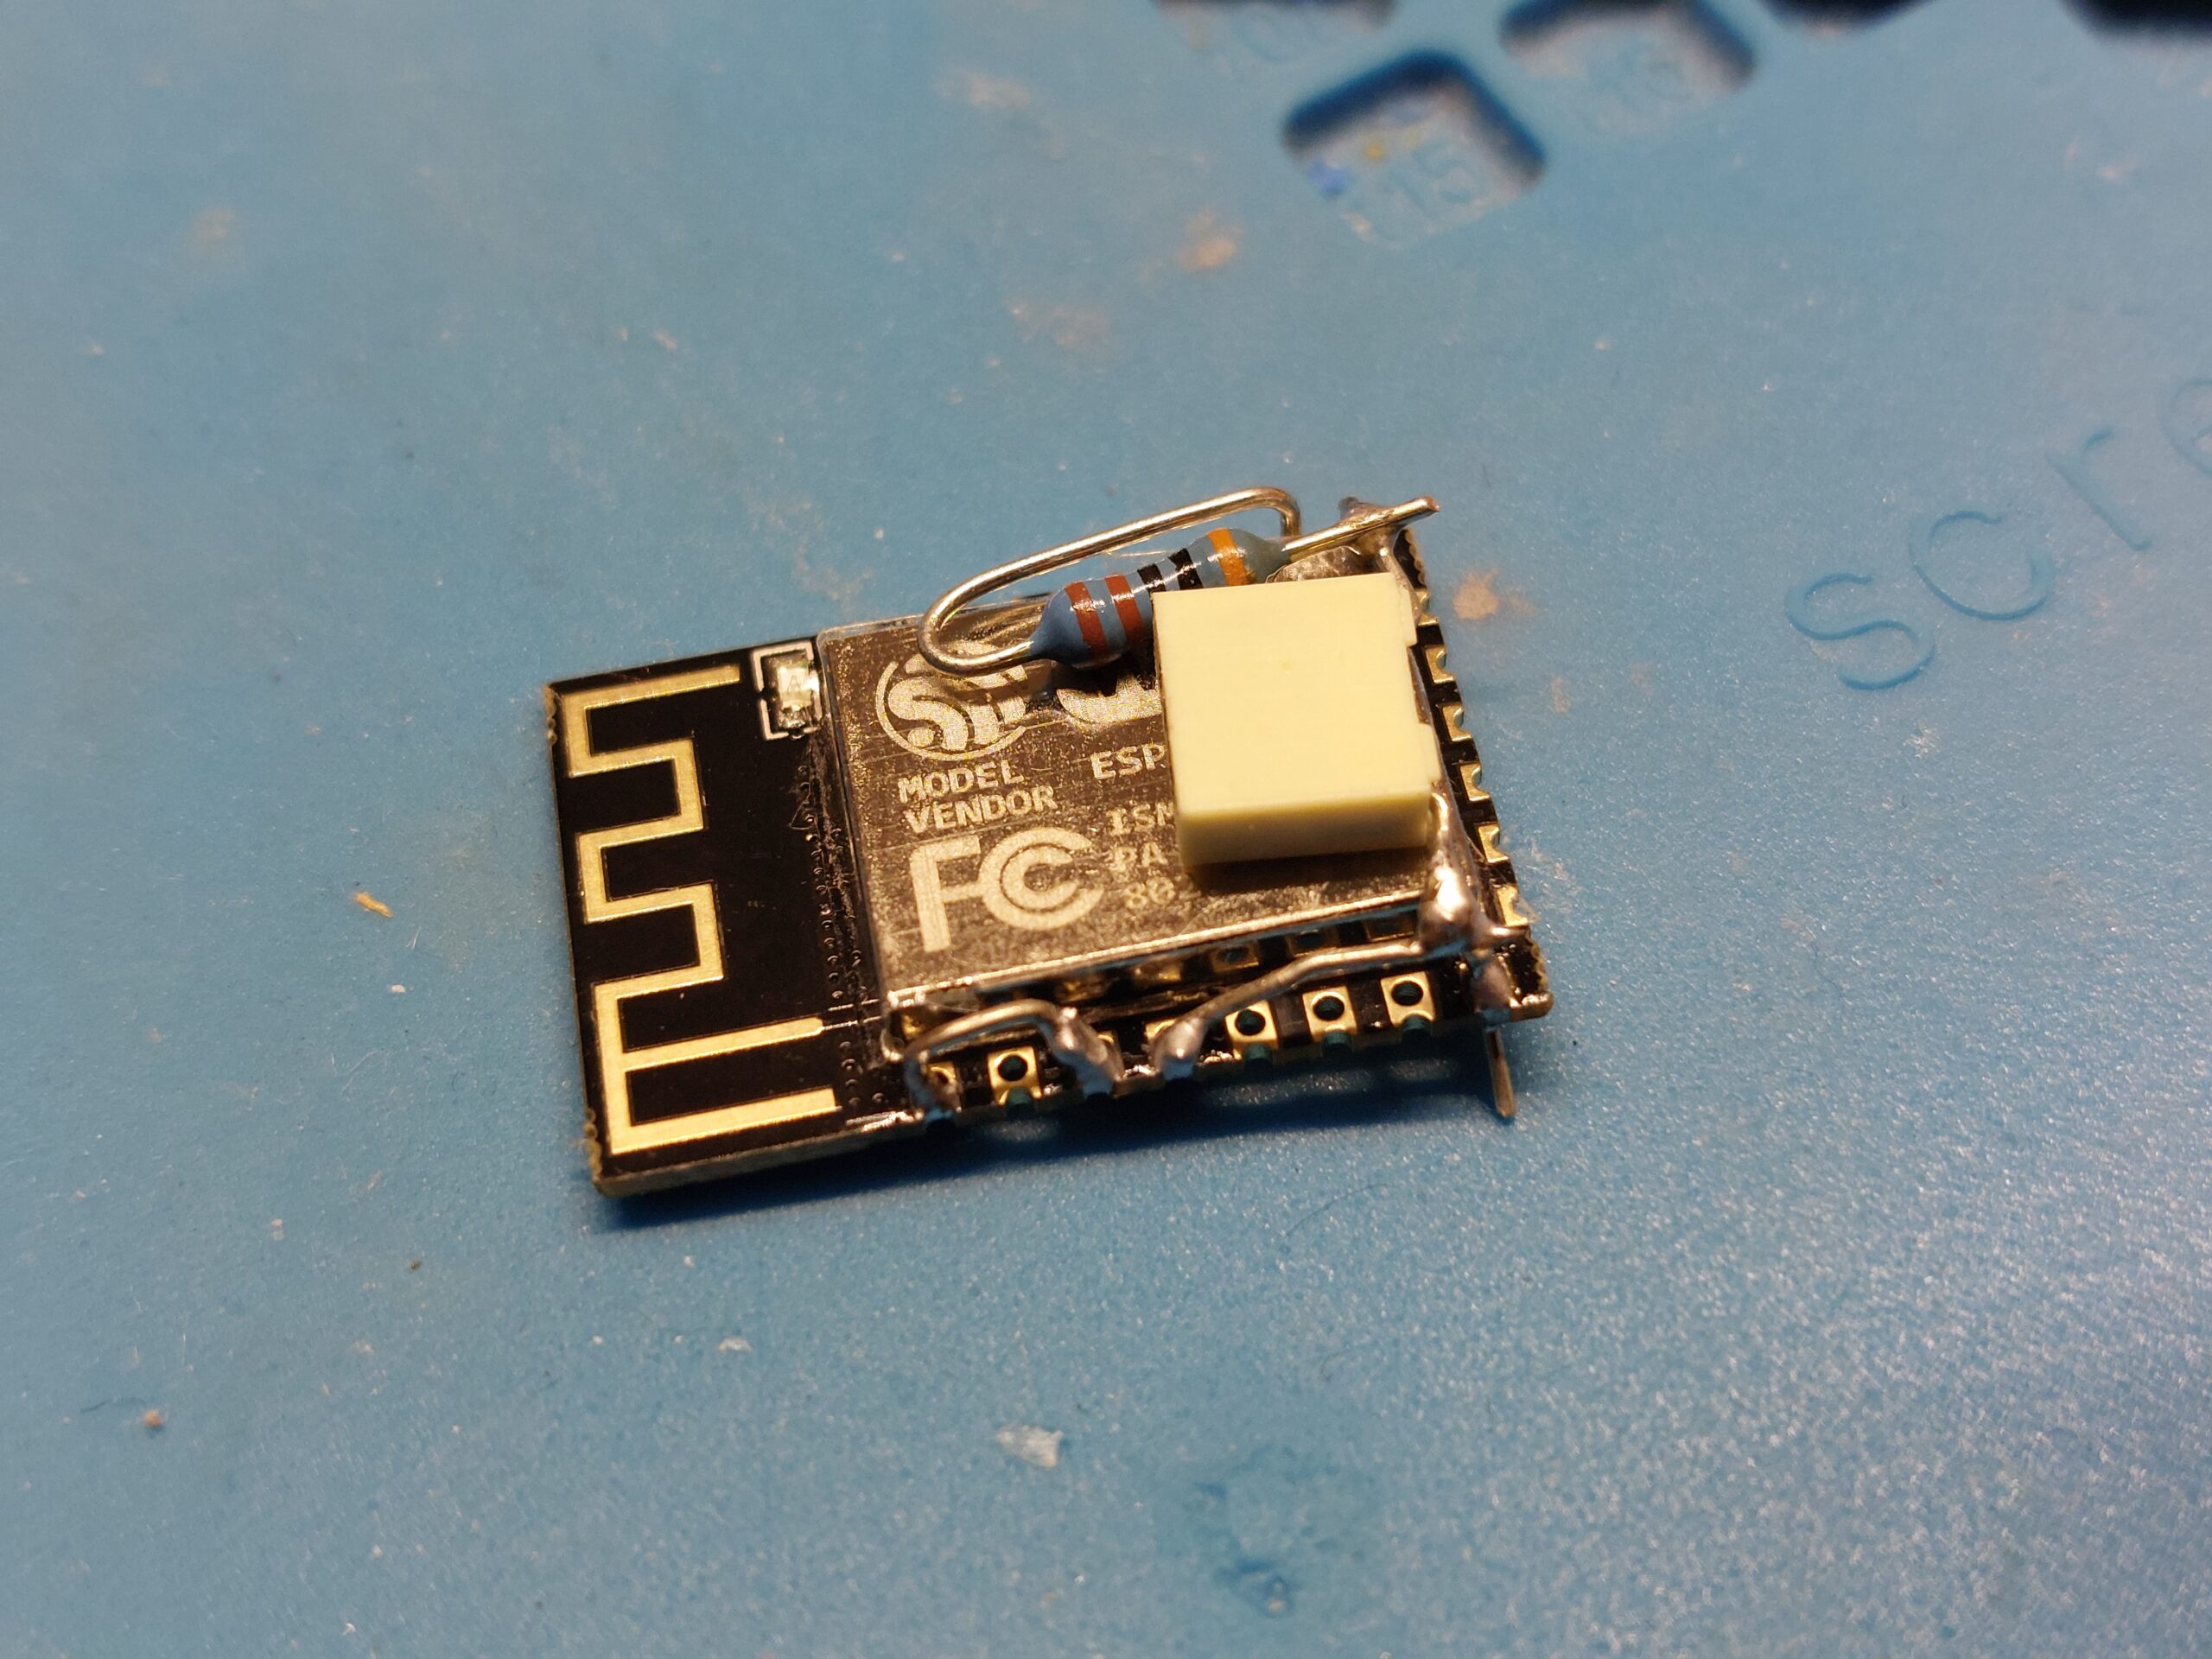
To increase the likelihood to successfully initialise WiFi, the connection to the WiFi was delayed by over a second to give more time the larger capacitor to charge with the limited current available. This was performed using:
esphome:
  on_boot:
    priority: -10
    then:
      - delay: 10s  # Wait 10 seconds before initializing Wi-Fi
- wifi.connect:Results
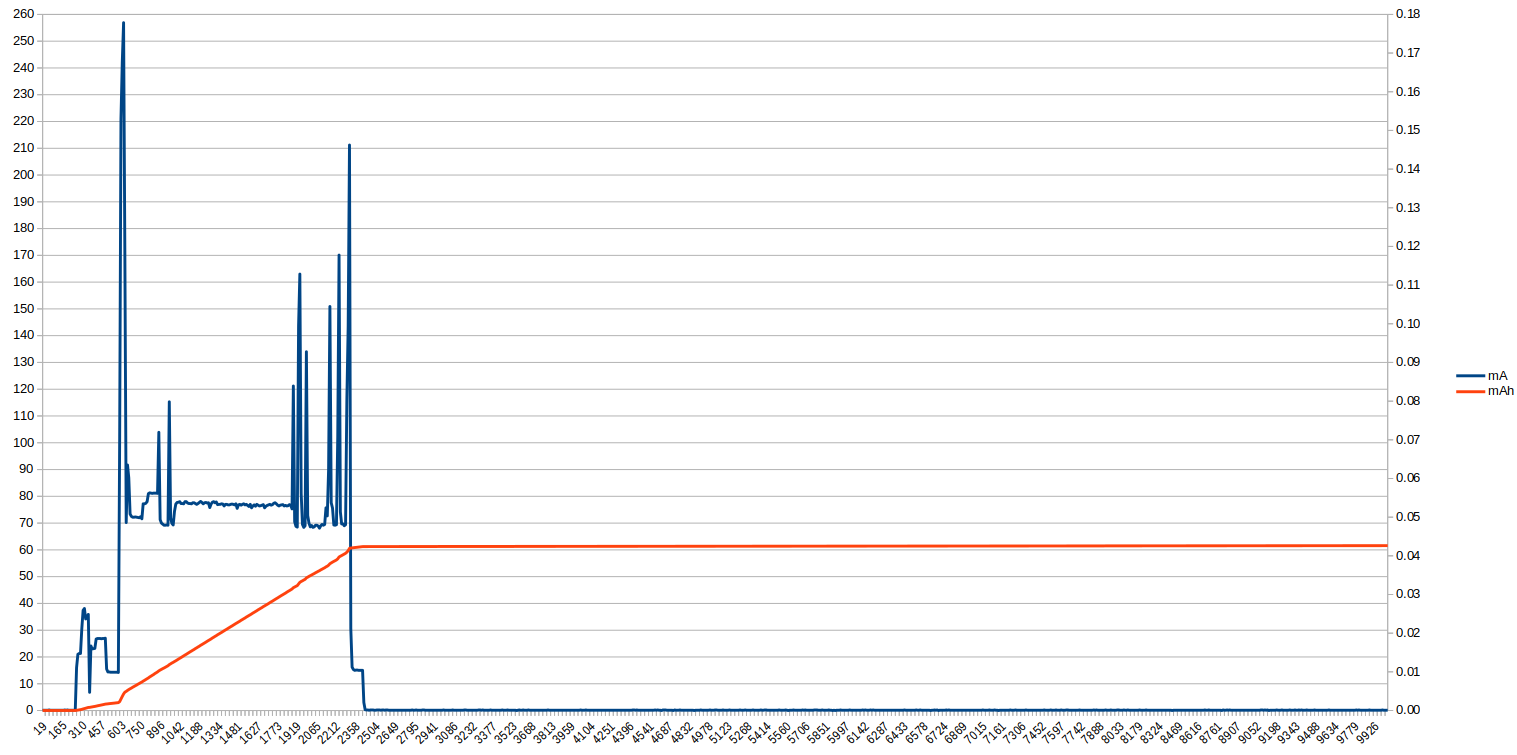
The initial spike in current consumption could not be avoided and the capacitor used didn’t help enough. In fact, a supercapacitor would have been needed to cover the initial consumption when the power supply can provide just 14 mA or little more. The ESP module was rebooting constantly.
The wires used for the ESP8266 were left accessible from the outside so that the light bulb, now consuming 14 mA * 3.3 V = 0.05 W less than it used to, can be switched manually between 2700 K and 6500 K.
Useful links
Bakke has a series of articles on reducing the power consumption of an ESP8266 when using pure Arduino. From 8.6 s and 165 μAh for a boot-sensor reading-transmit cycle to just 2.3 s and 43 μAh.