How to improve the cooling of a IBM 60GXP with a Duron heatsink
Someone might still not know the IBM Deskstar 60GXP fame, so here it is: when IBM released them, some years ago, mostly units among those with capacity of 60 GB failed (they were soon called “Deathstar”). This problem affected only the first stocks, but the name was compromised, even though every other product was fine (just check the reliability database, located at StorageReview.com).
I bought my 40 GB IBM Deskstar 60GXP before I heard the Deathstar fame, but I wanted to cool it a little anyway, since it was far warmer than my Maxtor 5400 rpm. As soon as I had the opportunity, I tried to do the best I could.
Contruction
Recently, the CPU fan of an AMD Duron in a friend’s PC broke down. The computer was still working well, but he decided to replace the assembly anyway, so we had a spare heatsink (we didn’t found 6 cm fans alone). We decided to use that heatsink to cool down my HD, that had a temperature of 41°C when not used.
My first idea was to use a thermal compound to improve heat exchange from the HD metal surface to the heatsink. Thanks to IBM that didn’t put paper labels on the full HD surface, like Maxtor does (maybe that could partially explain why Maxtors fail more frequently).
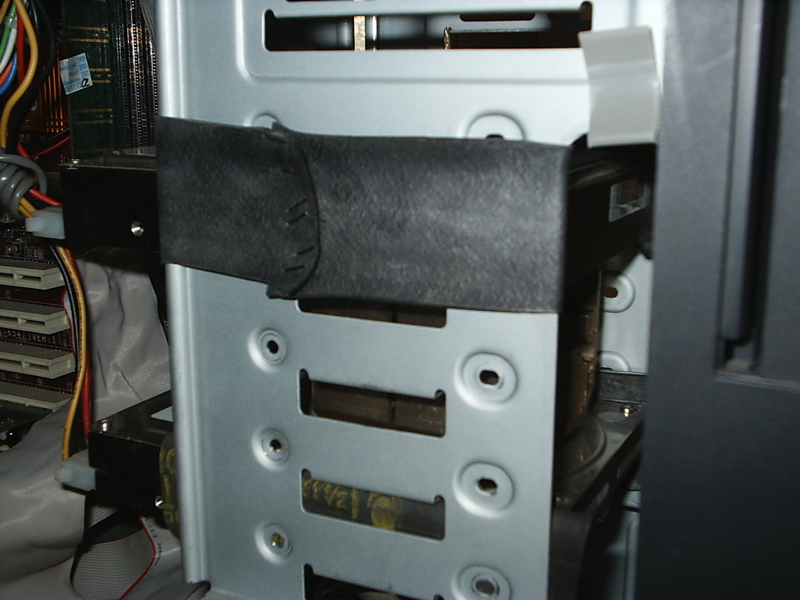
Initially, I thought that a rubber strip could have kept the heatsink well pushed to the HD and assured a good heat exchange. To keep the rubber stretched, I fixed it to the case, as shown in the photo:
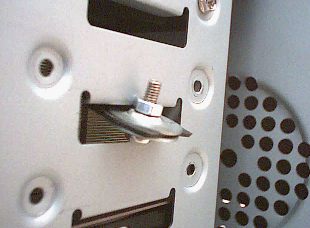
The strip was taken from a bicycle inner tube and it was cut by following the main circumference, in order to have it straight and not bended too much. I then made two holes on it, near the ends, to put a couple of bolts with washers on them: the bolts alone weren’t large enough to grip enough on the rubber, they would have torn it apart. The following picture shows the rubber strip over the heatsink, actually it push it down pretty hard, keeping it in close contact with the hard disk. A bit of thermal compound is visible on a side.
To have the heatsink work as better as possible, it must have the fins aligned with the air flow (you can see the air holes in the picture).
The result I obtained so far were pretty good: the idle temperature had fallen by about 2°C, from 40.5°C to 38.5°C. A that time I didn’t do any other test, since I thought a greater temperature gradient between the hard disk anc the air could only improve the heatsink effectiveness.
Unfortunately, while the temperature decreased, noise increased. I thought about these possibilities: increased hard disk-chassis coupling, with more vibrations transferred from the hard disk to the chassis (the Deskstar 60GXP was one of the first 7200 rpm units, so it was much less refined than latest generation hard disks with hydro-dynamic ball bearings). Another one could be the rotation pivot, compressed by the heatsink (the rubber strip was VERY strong…). Once thought about this possibility, I decided not to risk and I removed the rubber strip, using a more traditional glue to keep the heatsink firmly attached to the hard disk.
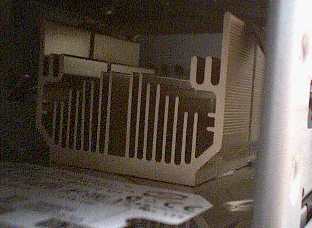
The final result is showed in the first picture, followed by others with more details, useful to correctly position the heatsink: it should be put were there is the maximum heat production, possibly directly on the metal case and not on the paper sticks.
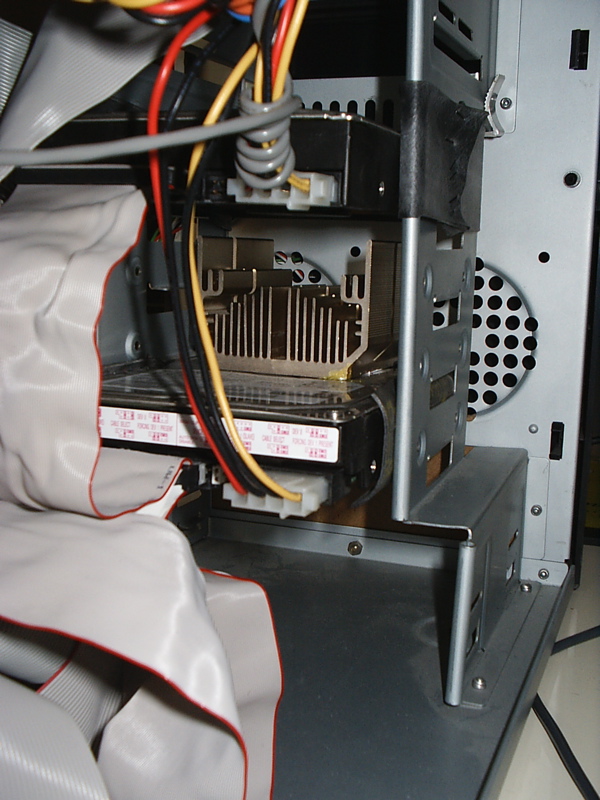
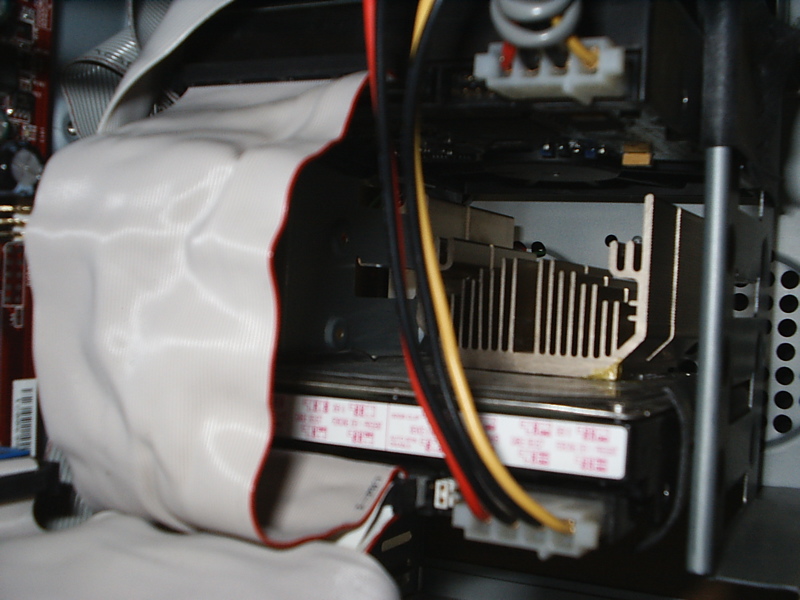
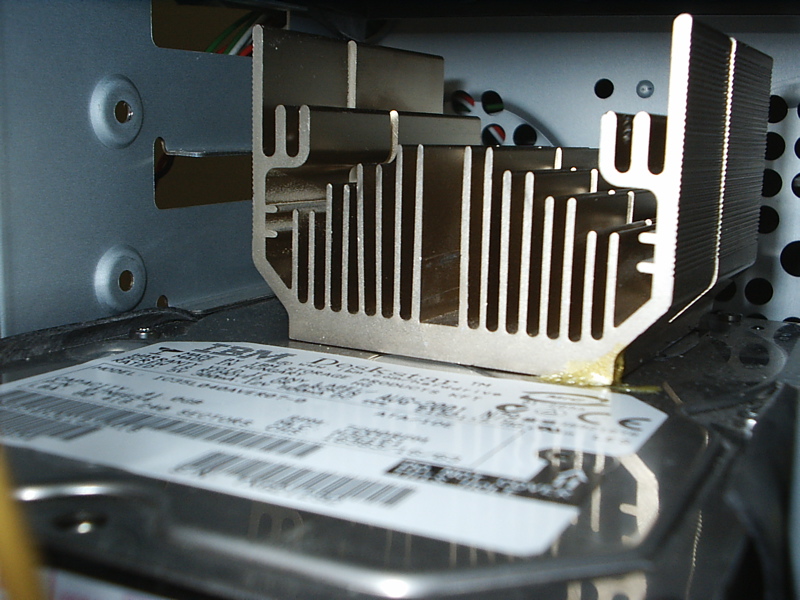
The pictures show some rubber put around the hard drives, you can read more about it on Hard drives noise damping.
The IBM Deskstar 60 GXP has always worked well since that day, only a bit noisier. Its temperature floats around 40-45°C, depending on the load.
All the temperature were measured with hddtemp, a free linux utility. Another useful linux tool is hdparm, it can set the hard drive seek speed on order regulated noise and useful life: hdparm device -M128..255. I decided to maximize the drive life, so I chose the least performance/least noise setting. Just to let you know… wen I tried to use the maximum performances setting with a Maxtor 5400 rpm drive (at that time it was the operating system drive, now it’s broken, as every good maxtor :-/) I was able to obtain a 50% cut on Windows XP Home boot time! As side effect, however, the noise resembled a caterpillar!
If you’d like to have more details and infos, feel free to contact me by electronic mail.
First version: 4 March 2006.
Applicazione di un dissipatore ad un disco fisso IBM
Miglioramento del raffreddamento di un IBM Deskstar 60GXP mediante dissipatore per Duron
Per chi non avesse mai avuto notizia di dischi fissi IBM Deskstar 60GXP, ecco la situazione: la IBM rilasciò, ormai anni orsono, una partita di dischi da 60 GB (il taglio massimo della serie) letteralmente “fallati”, si rompevano tutti (da cui “Deathstar”). Questo fatto inficiò non poco la sua reputazione in ambito di mass-storage, nonostante i prodotti fossero per il resto buoni e lo siano ancora (vedi database di affidabilità di StorageReview.com).
Al tempo io comprai un disco 60GXP in taglio da 40 GB che scaldava abbastanza, per cui, appena se ne presentò l’occasione ma prima di sapere delle sventure della serie, decisi di migliorare la dispersione termica in maniera “casalinga”.
Realizzazione
Il caso volle che la ventola del dissipatore di un Duron di un amico si rompesse, così da rendere necessaria la sostituzione dell’intero blocco (nota: il Duron andava bene anche senza ventola!). Io ne approfittai, la temperatura del disco fisso era, al tempo, intorno ai 41°C a riposo ed io la volevo abbassare il più possibile.
La prima idea che ebbi fu quella di usare della pasta termoconduttiva per migliorare la trasmissione del calore, nonostante (fortunatamente) la zona in cui vi era la massima produzione fosse interamente libera da etichette di carta (ciò non accade con altri dischi quali i Maxtor, che magari hanno una affidabilità minore anche per questo motivo).
Come metodo di fissaggio inizialmente pensai, per evitare l’uso di colle e per assicurare una forte aderenza con una conseguente buona trasmissione del calore, ad un nastro di gomma molto resistente, trattenuto ai lati del case, come in foto:
Il “nastro” non è altro che un lembo di camera d’aria da bicicletta, opportunamente scelto: la camera d’aria è un toro, il lembo va ritagliato col lato lungo parallelo ad uno dei due equatori. Una volta fatto ciò vanno praticati due fori alle estremità, così da permettere l’inserimento di viti, dadi e rondelle (il solo bullone, cioè vite più dado, non ha superficie sufficiente per trattenere la gomma senza lacerarla). Nella seguente foto si può intravedere il nastro di gomma passare sopra al dissipatore, di fatto tenendolo fortemente accostato al disco fisso, e un po’ di pasta termoconduttiva in eccesso fuoriuscire da un lato.
Inutile dire che, perché il dissipatore sia efficace, è necessario che le alette siano orientate lungo la direzione principale di circolazione dell’aria (nel mio caso si vedono, sul fondo, i fori frontali del case da cui essa entra).
Con questo espediente avevo già ottenuto un buon risultato: la temperatura, a riposo, ea scesa di circa 2°C, da 40,5°C a 38,5°C circa. Prove sotto stress non ne ho fatte, però suppongo che il delta termico non possa che aumentare, di conseguenza anche il vantaggio di avere un dissipatore.
Parallelamente alla riduzione di temperatura, si era verificato un aumento di rumorosità. Possibili cause erano la maggiore aderenza al rack del case, con conseguente trasmissione di vibrazioni (il disco è della prima generazione a 7200 rpm, vibra più degli attuali), oppure perché il perno di rotazione del disco fisso veniva compresso dal dissipatore (il nastro esercitava una notevole forza)… nel dubbio, non ho voluto rischiare ed ho scelto di passare ad un più tradizionale mastice.
Il risultato è visibile nella seguente foto, seguita da altre che mostrano i dettagli, utili per il posizionamento ottimale del dissipatore (esattamente al cento dei piatti, in corrispondenza del perno, o, in alternativa, nella zona con più metallo esposto).
La gomma che si intravede a lato dei dischi fissi è quella di cui si tratta nell’articolo Riduzione del rumore generato da dischi fissi .
Da quel momento il disco fisso ha sempre funzionato bene, sebbene sia leggermente più rumoroso che in partenza. La temperatura si aggira sui 40-45°C, in base all’utilizzo.
Tutte le misurazioni di temperatura sono state effettuate mediante hddtemp, utility linux gratuita. Per chi fosse interessato ricordo che con hdparm, sempre per linux, è possibile impostare la rumorosità del disco fisso, il che si traduce nella regolazione della velocità di spostamento delle testine (hdparm device -M128..255). Nel mio caso, per massimizzare la vita operativa, ho impostato massimo silenzio. A titolo di esempio, impostare massime prestazioni portava, il giorno in cui provai sul disco Maxtor visibile nelle foto (al tempo era il disco di sistema, ora è rotto, come ogni Maxtor che si rispetti), a dimezzare i tempi di avvio del Windows XP Home e di qualche altra operazione che metteva sotto stress il disco. Il rumore, tuttavia, era così forte da comportare serie preoccupazioni: era come un trattore.
Per ulteriori chiarimenti o commenti, contattatemi per via elettronica.
Prima revisione: 4 Marzo 2006.